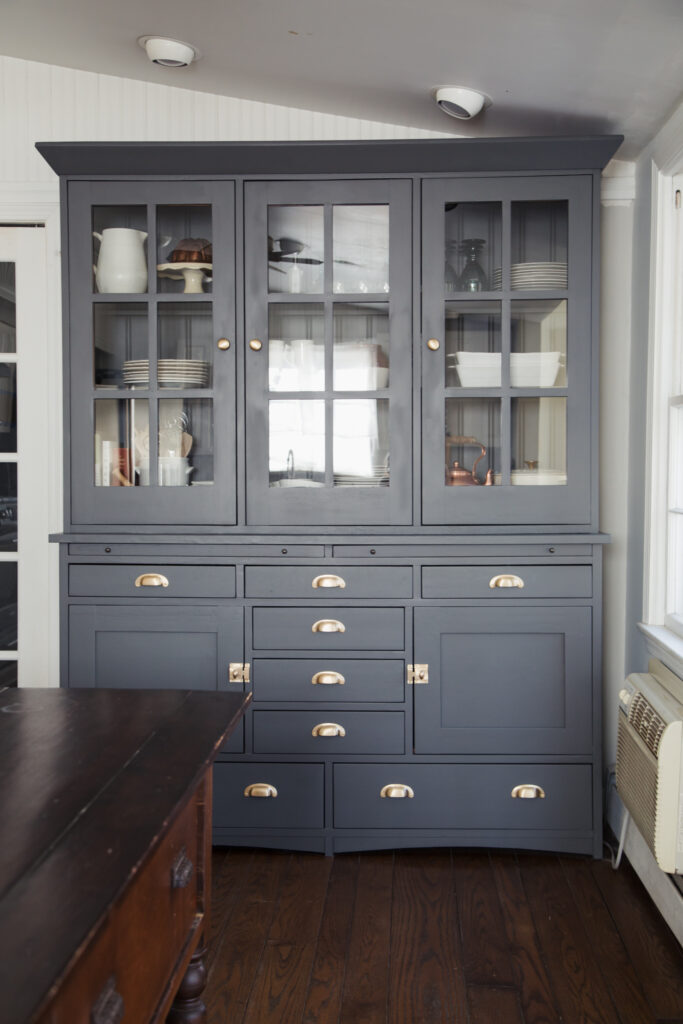
Today I am so excited to share my English cottage kitchen inspired hutch makeover. When we bought our house 6 years ago, it was very apparent that the kitchen was a casualty of a sloppy early 2000’s remodel. None of the original charm of our historic New England home was preserved in the way the space was laid-out or in the finishes. The plan has always been to do completely overhaul the space, and restore original charm while also making it functional for modern living. The vision for this space has been to an English cottage kitchen.
English cottage style is classic, comfy, functional and timeless. Think: DeVol Kitchens, or Plain English Kitchens.
I begun this process in the sunroom/breakfast nook by replacing the trim, and lighting switching out the furniture and adding a subtle contrasting trim. Next, I replaced our dated island with an antique French bakers table. Now it was time to deal with this space:
The space: Before.
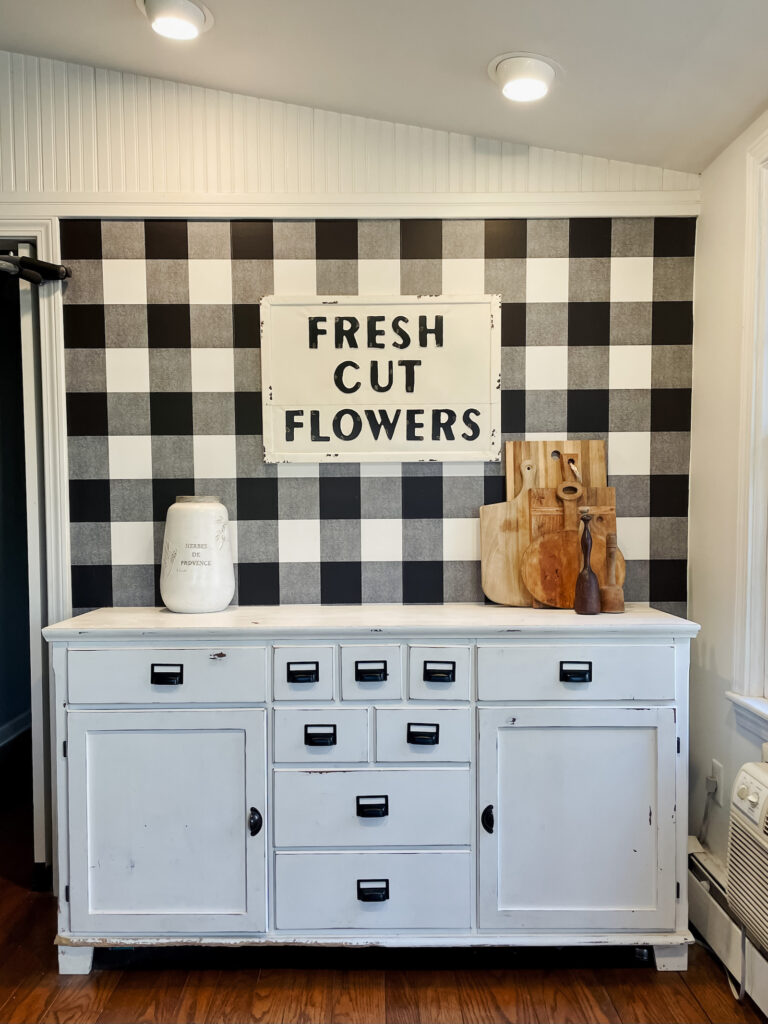
I put together this space, added the peel and stick wallpaper and painted this hutch a few months after we moved in to add more storage to the kitchen (it is terribly scant on storage). It was always meant to be a temporary fix, and I’m so glad I waited a bit to really start working on the kitchen, because my design style has evolved quite a bit over the last several years as I’ve learned more, and also let my house speak to me about what it needs, and what it should look like.
For this space I wanted to add a beautiful English kitchen larder inspired hutch, something that would make a statement and be a special “moment” in the kitchen, while still providing tons of great, practical storage. I scoured FB marketplace for weeks until I found the perfect candidate for the project.
FB Marketplace hutch, and inspiration:
I wanted something well built, solid wood (not veneer), but not precious enough that I would feel sick painting it. (I.e. no pine antiques, etc.). I knew I wanted a painted hutch look for the space. I also wanted something that would completely fill the space, and ideally would have inset shaker doors, since ultimately that’s where I’d like to go with our cabinetry once we do a full remodel. I know, no small ask. Luckily the universe delivered, because I found this beauty on FB marketplace in Rhode Island for $250. It was perfect. Perfect size, solid wood, not an antique, and inset shaker doors. I knew I could transform this into my dream hutch. We hooked up the trailer and drove the hour an a half to the Ocean state to pick it up.
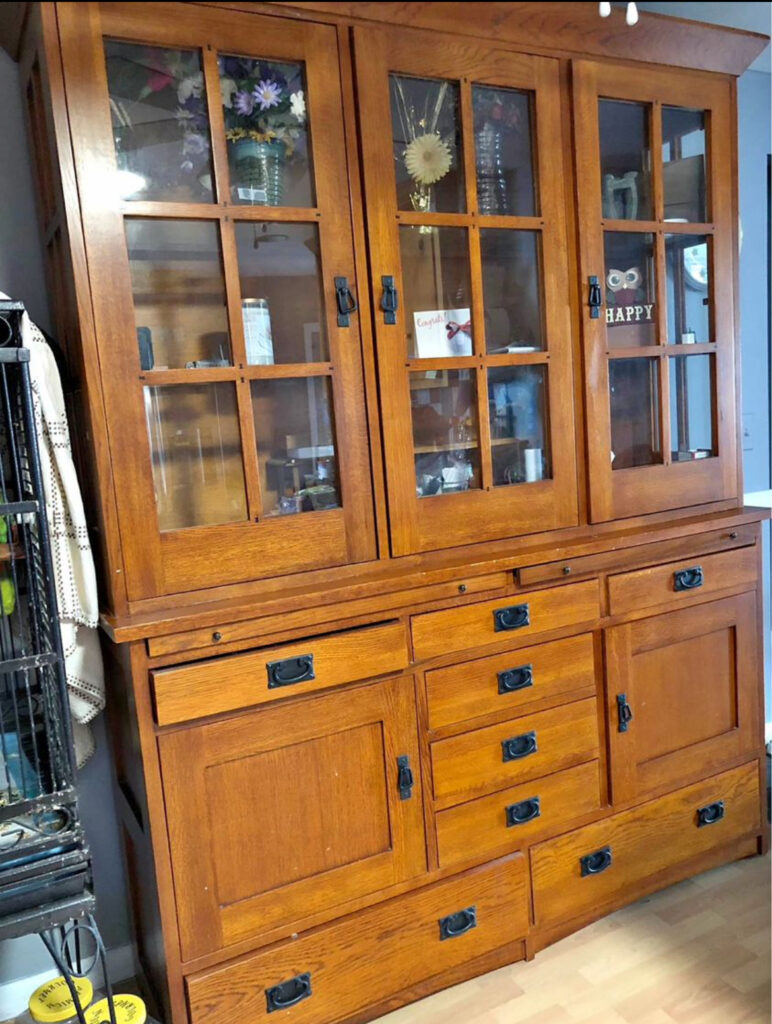
FB Marketplace hutch: Before 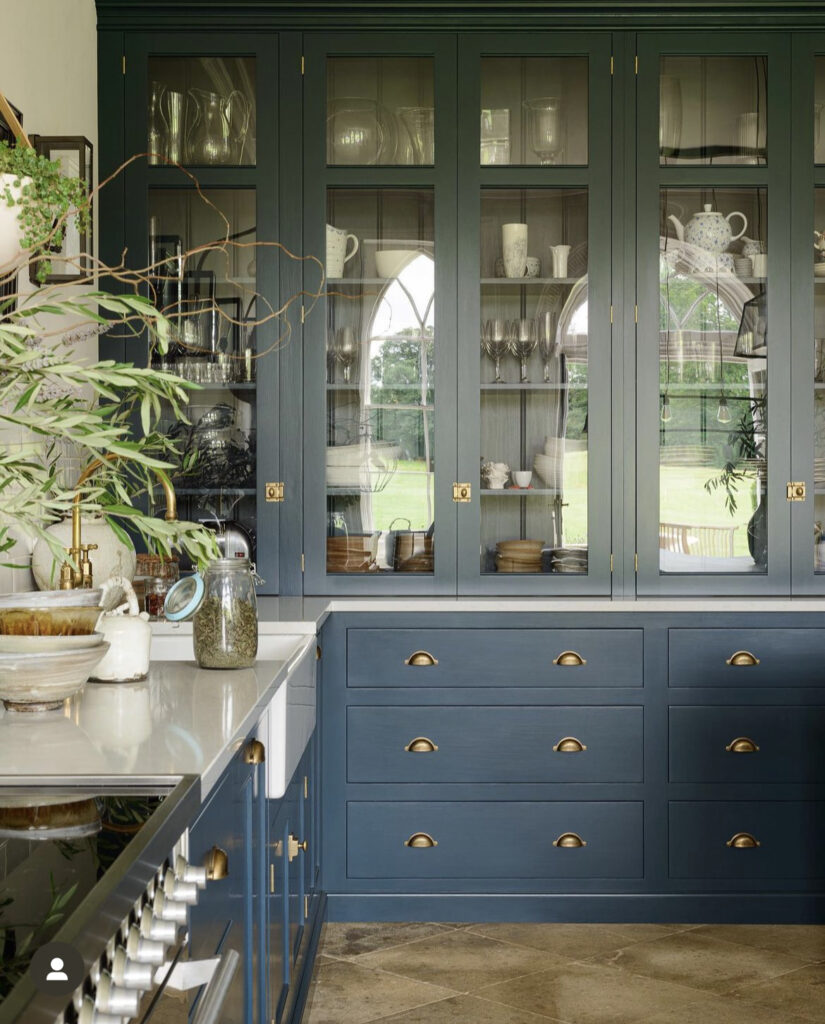
The Inspiration
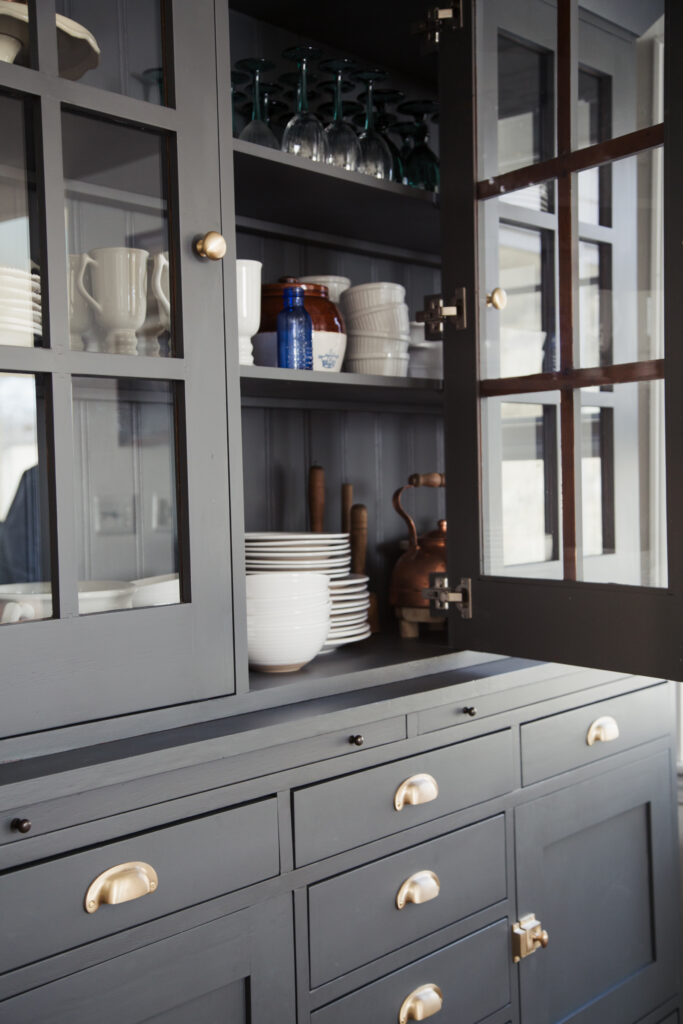
Once we got it home, (no small feat, this hutch is huge, solid, and extremely heavy) the process of transforming it into the English cottage kitchen inspired hutch of my dreams began. I spent weeks during Finn’s naps, sanding, filling hardware holes, priming, painting, replacing the backing with beadboard, painting some more, and eventually adding all new English hardware.
(you can watch the whole process of transforming the hutch on my instagram reels)
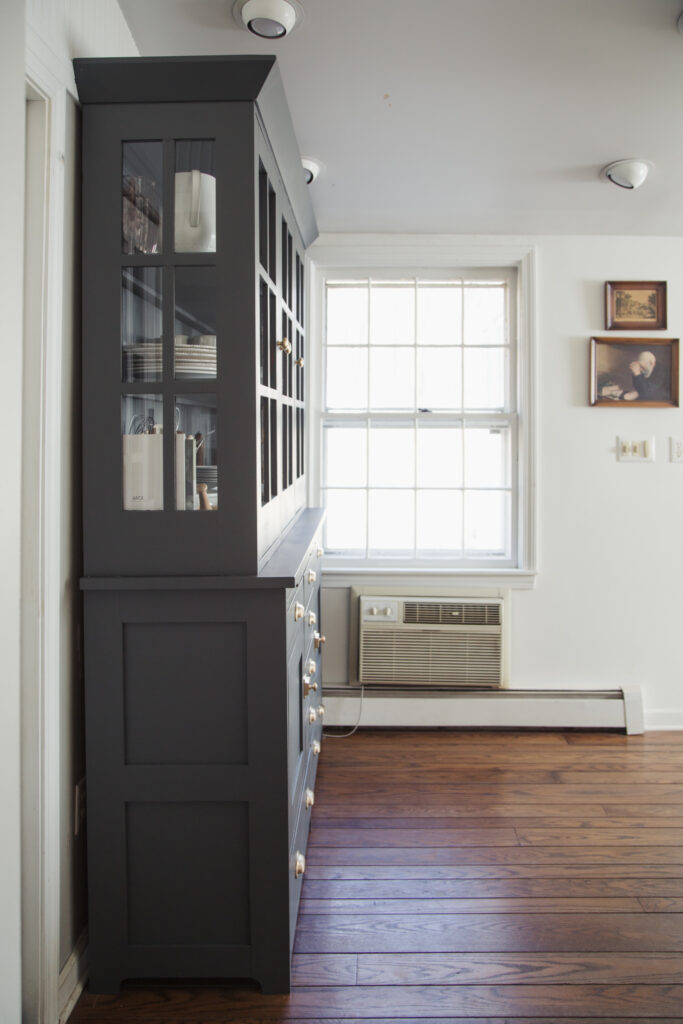
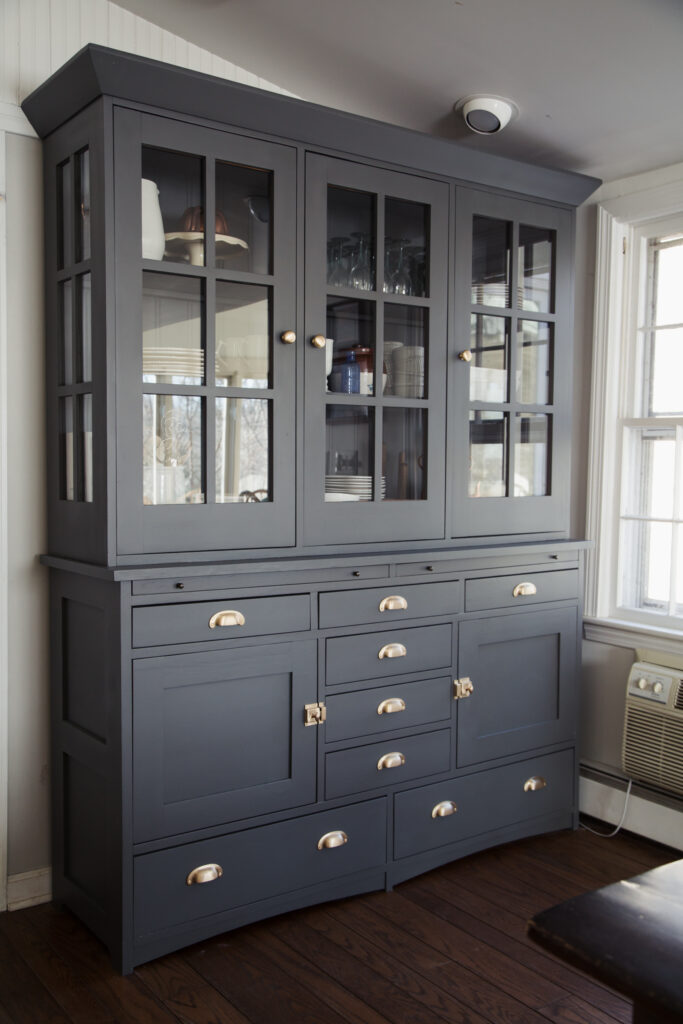
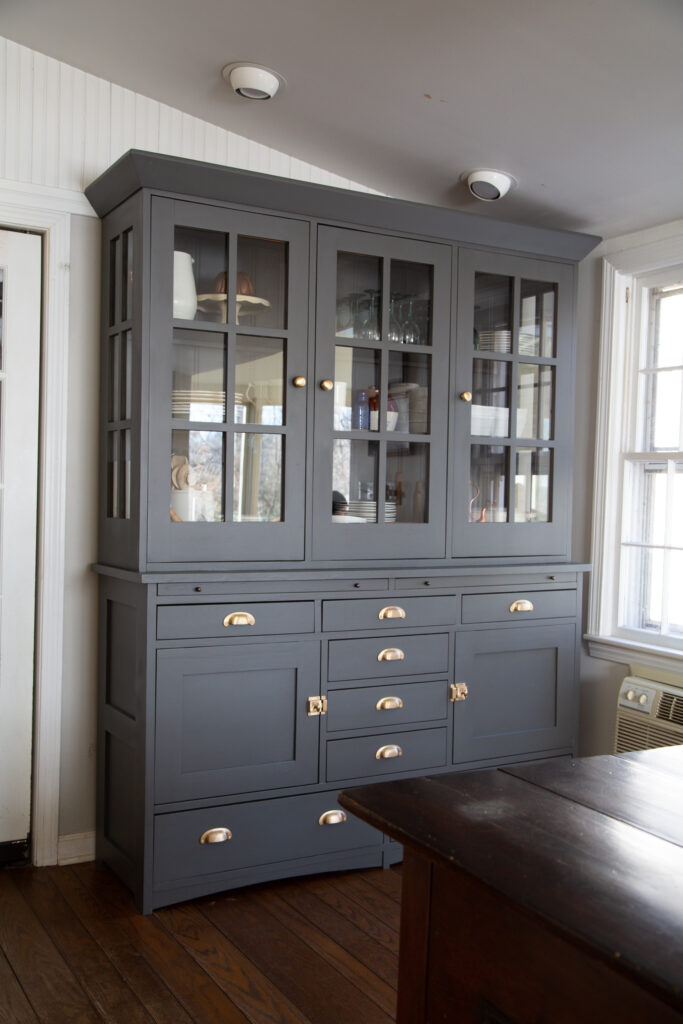
At the end, I had completely transformed this dated early 2000’s hutch into this:
After:
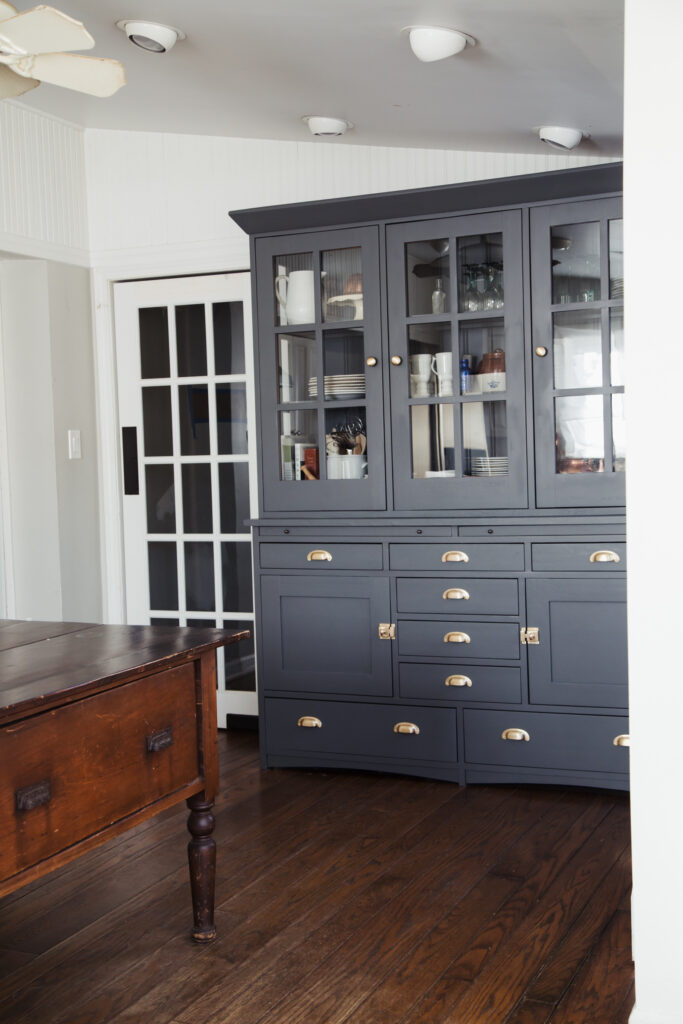
There are many times where I have a very specific idea for a project in my head, and the end result is a little disappointing. This was not one of those times. I had a very specific image in my head of how I wanted this hutch to look finished, and it is exactly what I was imagining. That’s a very satisfying moment, let me tell you. Let me share a few MVP’s that made the hutch transformation a success.
My siphon gun paint sprayer.
I’ve been gushing about my siphon gun paint sprayer for years, and it came through (yet again) with the most perfect finish. I used it exclusively on this hutch and the finish is so flawless. It’s not a great option for a large project (like painting a house for example) but for smaller projects like furniture it gives you the smoothest most flawless finish, has very little overspray and is SO EASY to clean up.
I painted the hutch the color: Iron Mountain from Benjamin Moore. I used their Ben line in an eggshell finish, and it went on beautifully.
Liquid masking.
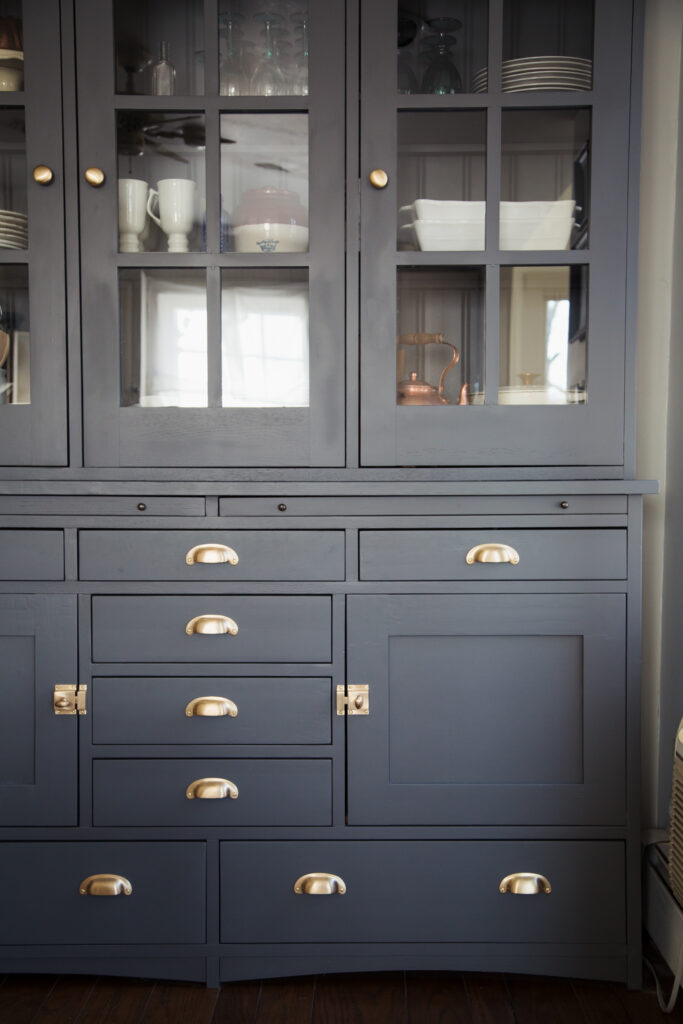
One of my favorite parts of the hutch are the beautiful windows, it adds visual interest and makes it possible to create a lovely vignette in my kitchen. But I new since I was spraying the hutch I would need a really good solution to protect the glass, and painters tape is often a messy sloppy solution. I’d seen liquid masking all over the DIY space and thought it might be a good solution for my situation. I’m happy to say it was perfect, worked like a charm, was easy to apply and came off flawlessly. I’ll be using it again and again.
How liquid masking works: it’s a thick milky substance that you basically paint it on the glass, let it dry, then paint. Once your paint is dry, you scour the edges with an exacto knife, then peel the masking off and you have clean perfectly protected glass. You can see how it worked for me here.
Beautiful English hardware from YesterhomeUK.
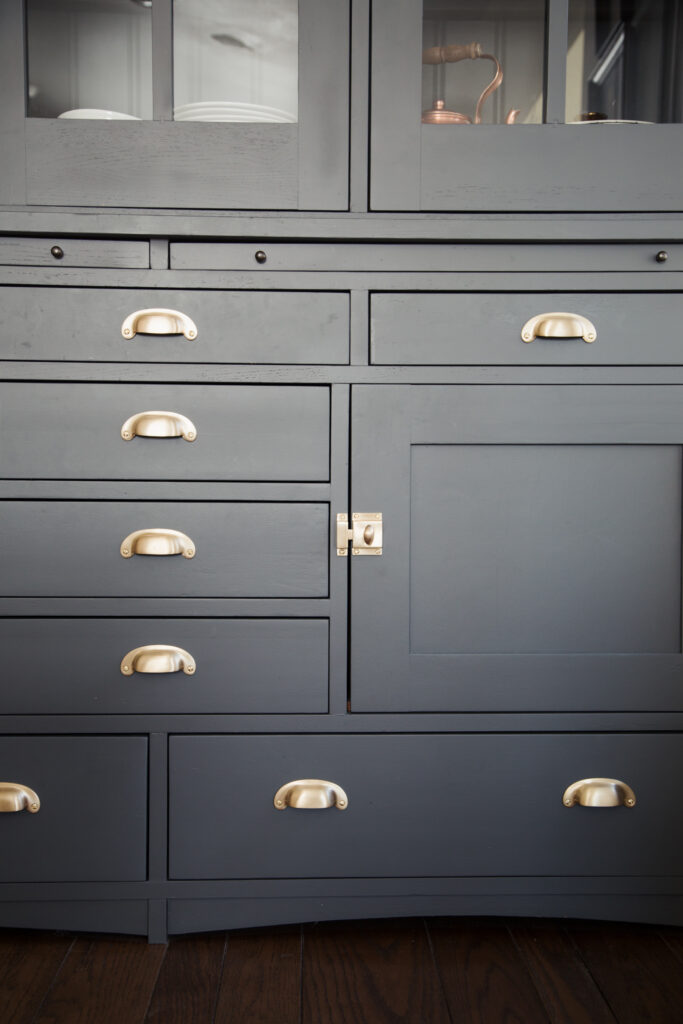
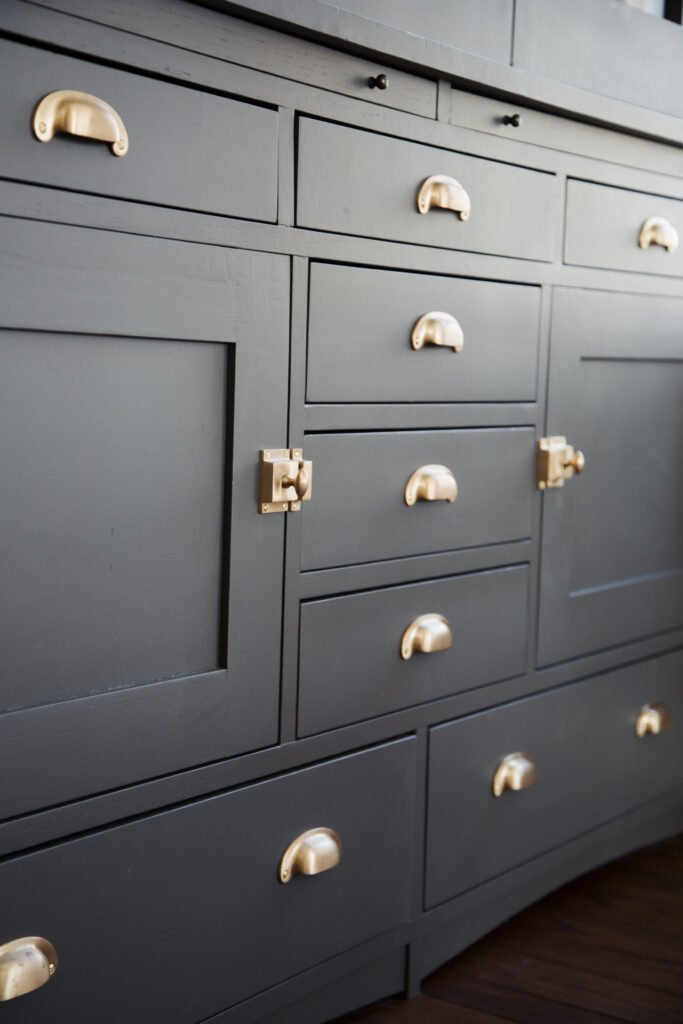
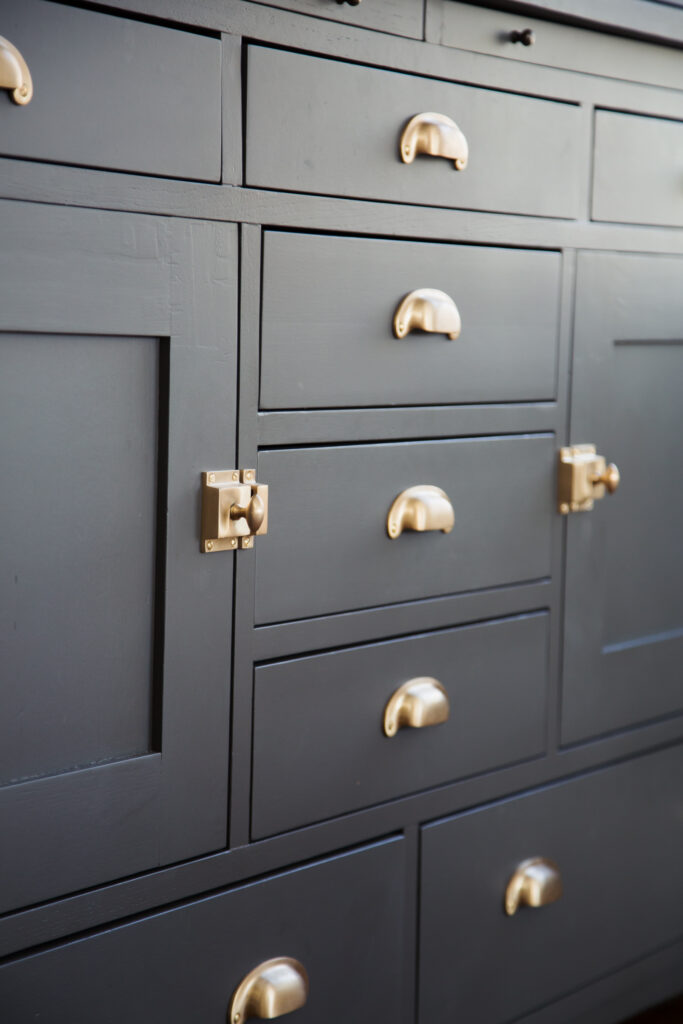
I knew the key to really transforming this hutch would be switching out the dated hardware for classic English hardware. I wanted beautiful brass cupboard latches, cup pulls, and knobs. I looked all over the internet, read tons of reviews and eventually settled on YesterhomeUK for my hardware. I went with their brushed brass line. The quality is incredible. The hardware is made of an unlaquered brushed brass, and since brass is a living metal, it will naturally age and patina over time. I’m so excited to watch the process.
I went with the brushed brass to get a little more of a matte texture and finish and I love them. It’s a bit different than your typical shiny, unlaquered brass hardware, (think of it like the difference between polished and honed marble) since I love matte textures it’s perfect for me. Yesterhome also offers a shiny brass in this style if that’s your cup of tea. Hardware is not something you want to skimp on, since (especially in a kitchen) it gets tons of use. Quality is important. I spent as much on the hardware as I did on the entire hutch, and I have no regrets. The quality is incredible and I know these pieces will last and be beautiful for years. I highly recommend the brand.
I am completely happy with how this hutch turned out, and can’t wait to see how it compliments the rest of the kitchen once we do the rest of the space. I love all the extra storage it’s given us, and the way it’s transformed an awkward space. I especially love that I was able to put some time and elbow grease into this project and create the exact piece I wanted for my kitchen.
What do you think? Would you attempt this DIY?
