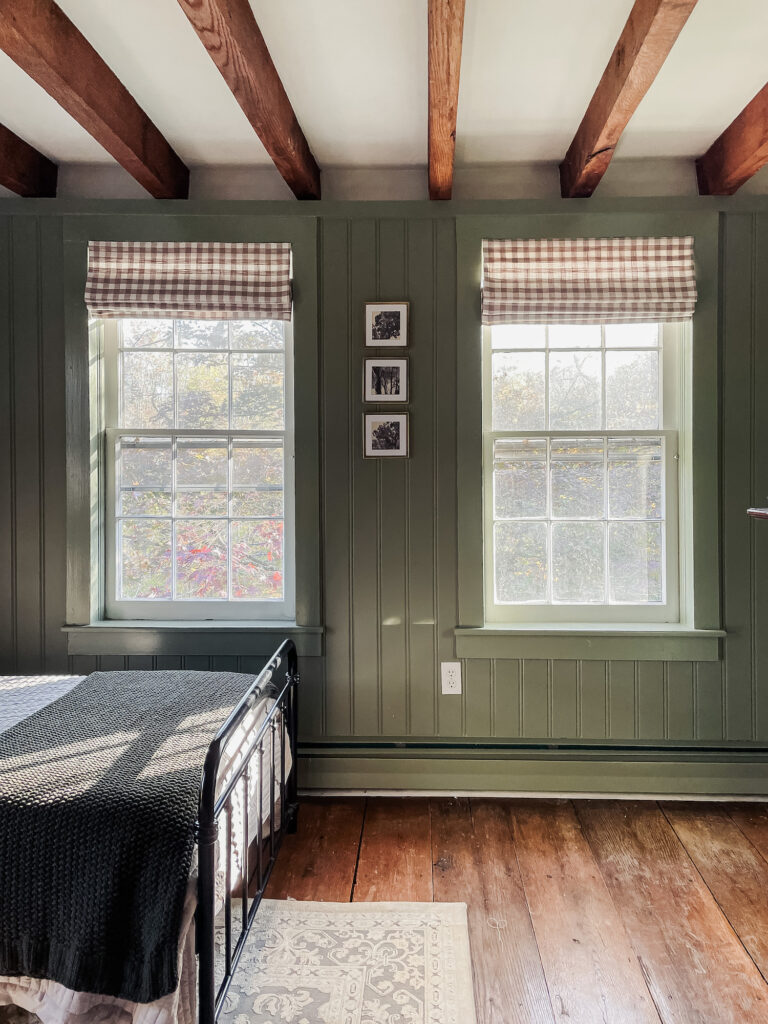
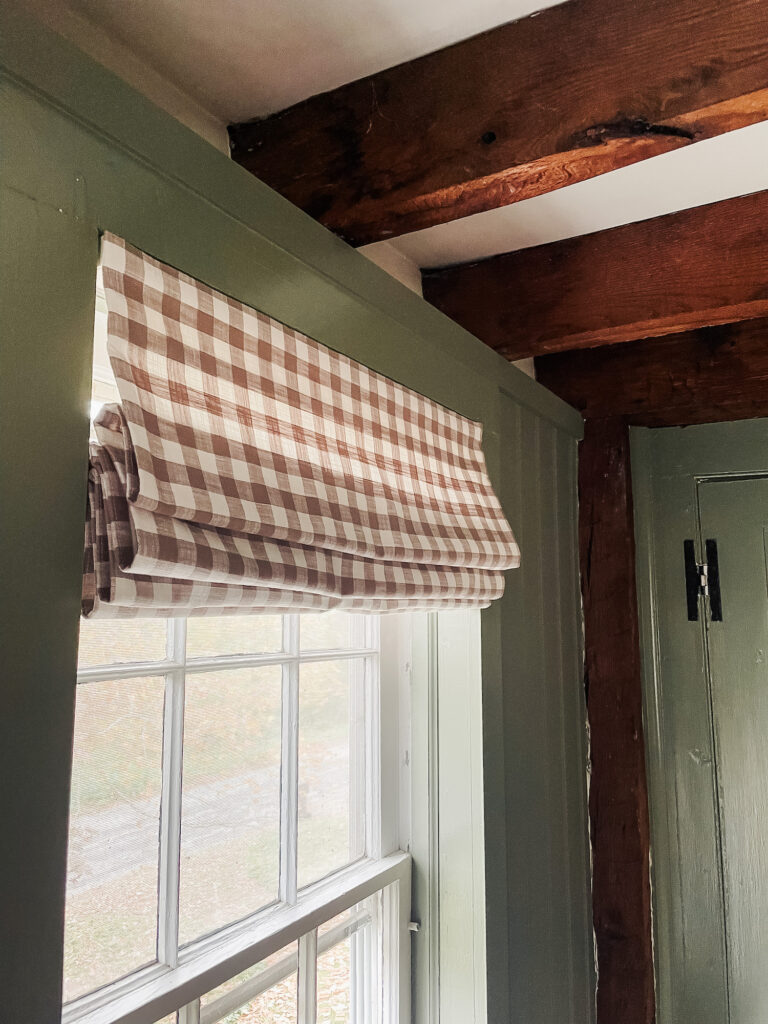
I am so excited to share my DIY Cordless Roman shade tutorial with you today!
This process was born out of necessity, when I couldn’t find a roman shade in a fabric I loved for the boys room, and every “custom” option I found online wasn’t cordless. I got to work figuring out a solution.
First I searched the internet for “DIY cordless roman shade tutorials,” but the problem was, every tutorial I found online either had long cords hanging down (not what I wanted with a toddler running around), or literal mini blinds glued to the back. Not to throw shade at anyone’s DIY, but I like the inside of my projects to look as good at the outside, and I knew doing it that way would drive me nuts. Plus, with blinds, since you can see them from the outside, I feel like the back should look nice as well.
What makes this tutorial different is that you will be using the mechanism, and hardware from a cordless mini blind, but you are removing all of the blinds and attaching a true roman shade (boning and all) to the mechanism.
This DIY Cordless Roman shade tutorial requires very little sewing skills and can be done in less than an hour, but it turns out beautiful and professional looking. It’s also very affordable, depending on the cost of the fabric, the whole project rings in at under $20. And in the end you’ll have beautiful custom cordless roman shades!

First step is to measure the inside of your window width and height. Then you need to purchase the supplies below, including a cordless mini blind with measurements that coordinate with your window measurements. (Tip: make sure you measure the width of your window at the top, middle and bottom. Sometimes the measurements can vary. Go with the SMALLEST one)
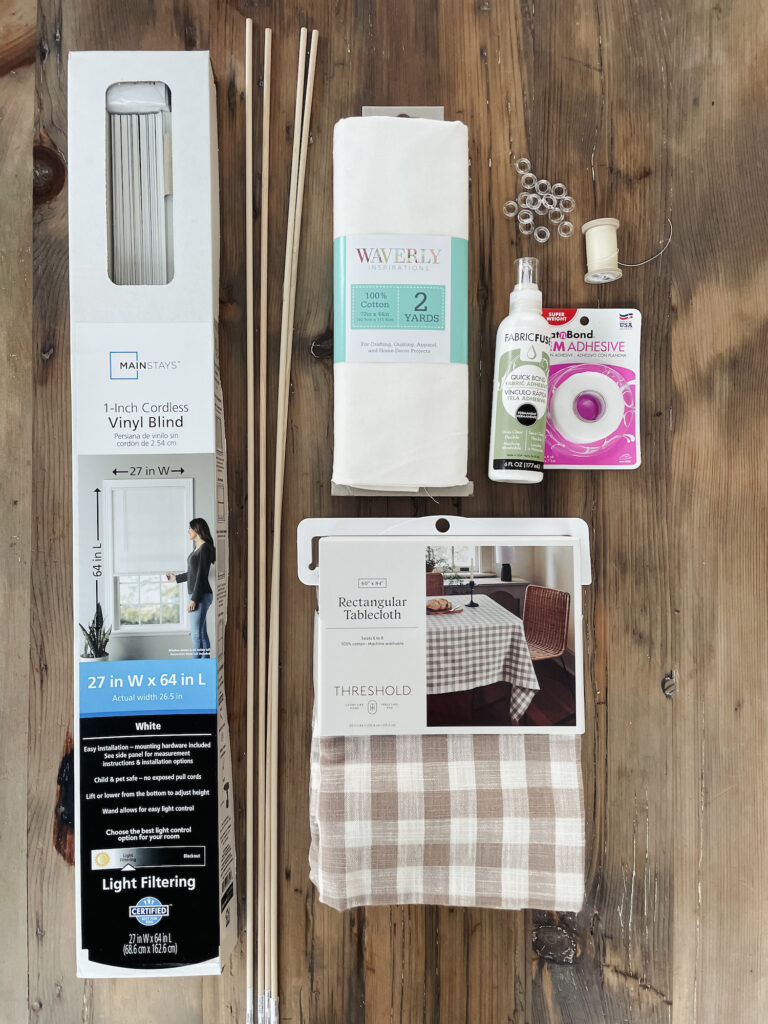
Supplies you will need for this project:
Cordless mini blinds: I like these ones from Walmart the best. They are the lowest price, the quality is great and they are crazy easy to install.
Fabric of your choice: for these roman shades I used this table cloth I found at target. It was the perfect weight and the color and pattern were exactly what I was looking for in the room. I was able to get 2 shades out of each tablecloth.
White backer fabric: you need enough yardage of this to cover the entire back of your shade so measure carefully. I like grabbing these pre-cut Waverly yards from Walmart. They’re very affordable and come in 1,2, and 3 yard increments.
3/16-5/16 Wooden dowels: take the measurement of the length of your window, subtract 4 and divide by 10, then subtract 1. That’s how many dowels you will need.
Example: My window measurement: 54″ long. 54-4= 50/10=5 -1= 4 dowels.
1/2 inch roman blind curtain rings.
I have found the best prices for the supplies needed for this project are at Walmart. Some of the items on amazon are quite a bit more and the shipping is still fast.
Step 1: Cut out your backing fabric.
Take your window length measurement an an inch for every dowel you are going to insert. example: 54 inch window length + 4 dowels= 58″ total length.
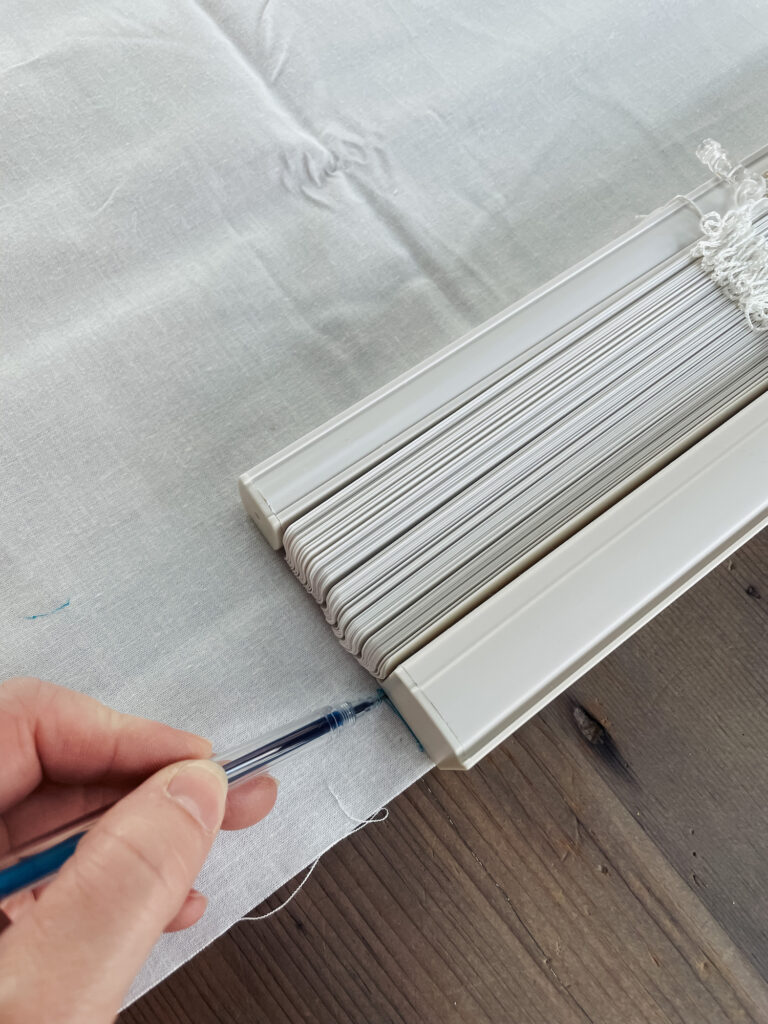
Lay your backing fabric out and using your mini blinds as a guide mark the width down the entire length of the fabric. Draw a line for that edge and cut out the backing.
Now you are going to create the segments of your roman shade. Starting from the top of the backing fabric, measure down 4 inches, then add another 10 inches. Draw a line (your first line should be 14″ from the top). Now measure down 1 inch, and draw another line. (See image above). Once the second line is drawn, measure down another 10 inches, and then repeat to the bottom of the fabric.
Step 2: Create your boning segments.
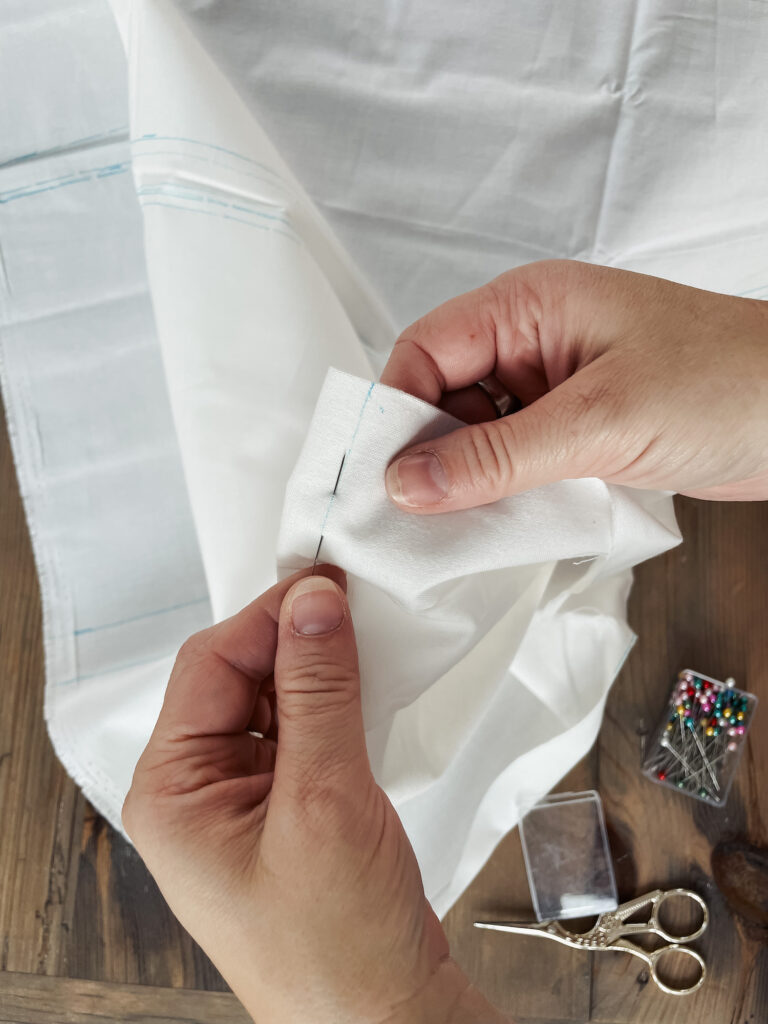
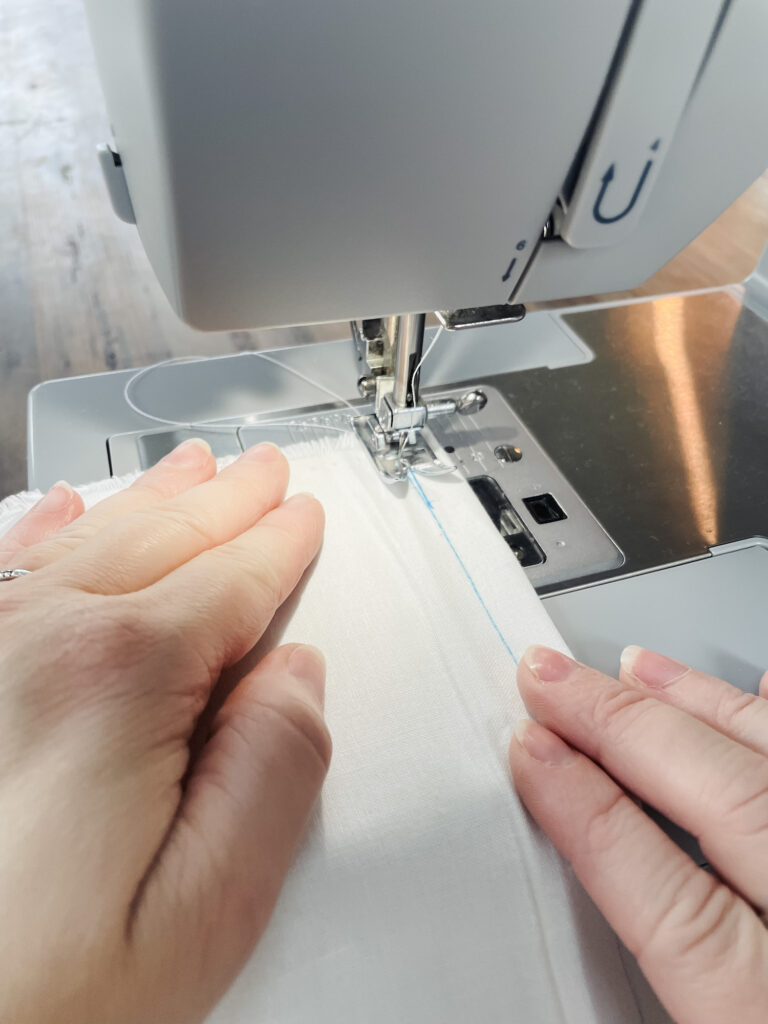
Pin your 1 inch segment lines together and stitch them together to create pockets for your dowels. (See image below. This creates the boning for your shade) If you don’t own a sewing machine, you can try renting one from your local fabric store and many libraries have sewing machine you can “check out” as well. I use this Singer model for all my sewing and it’s a great machine. I’ve had mine for over 10 years and it still runs beautifully.
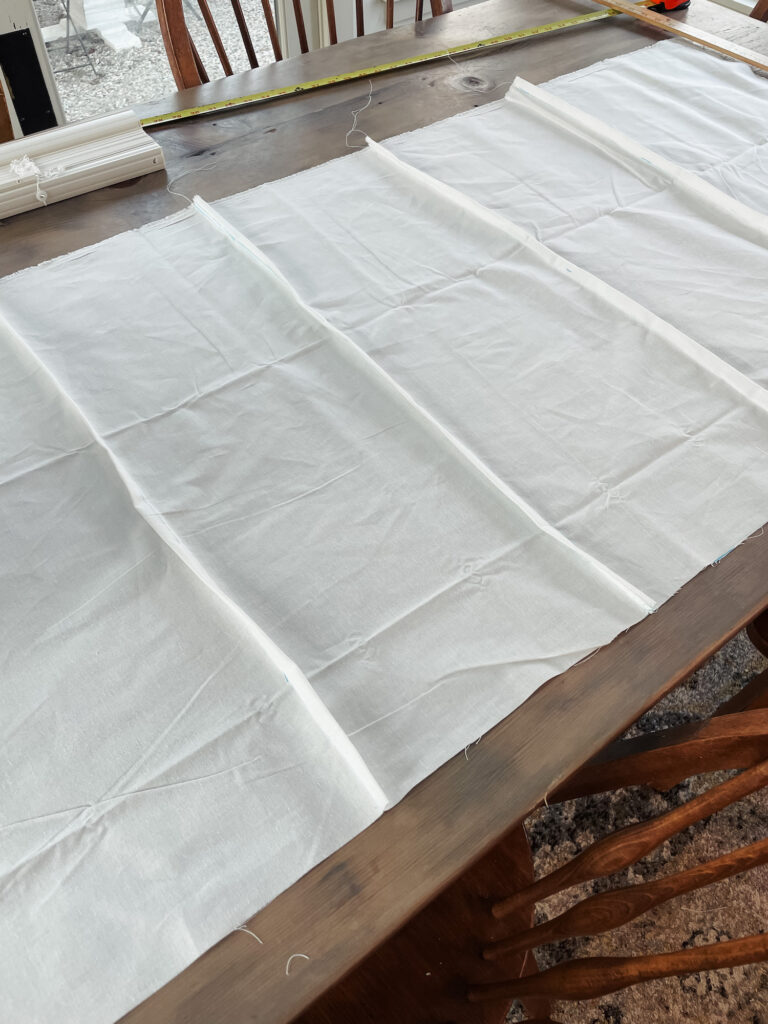
Step 3 insert your dowels.
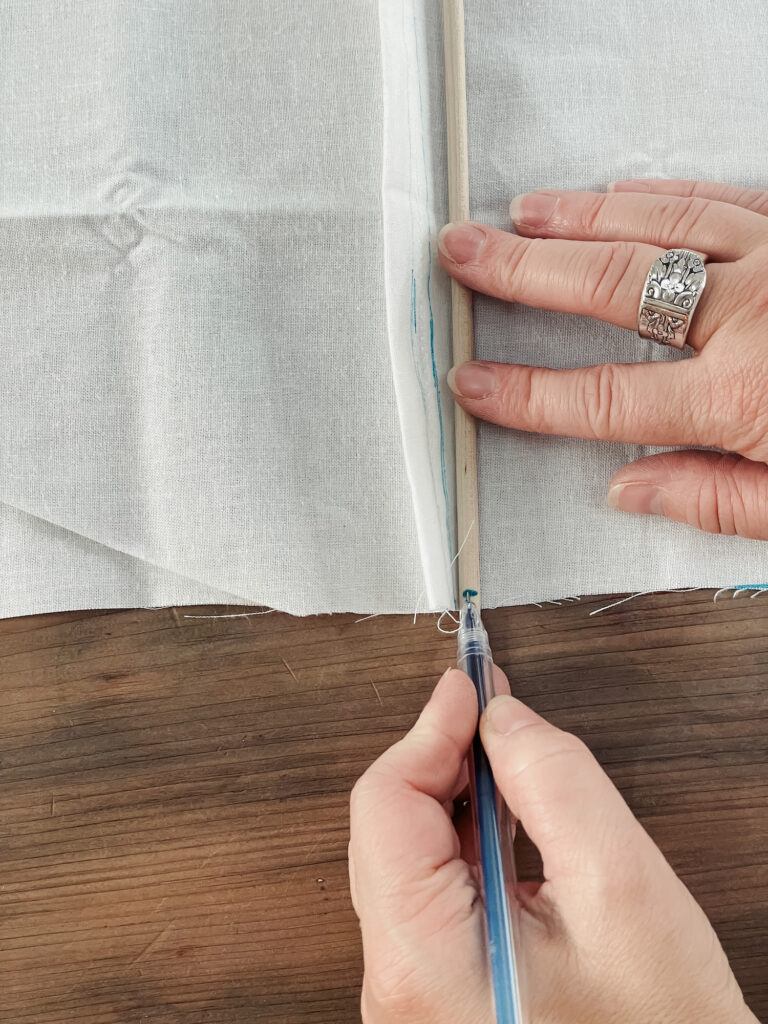
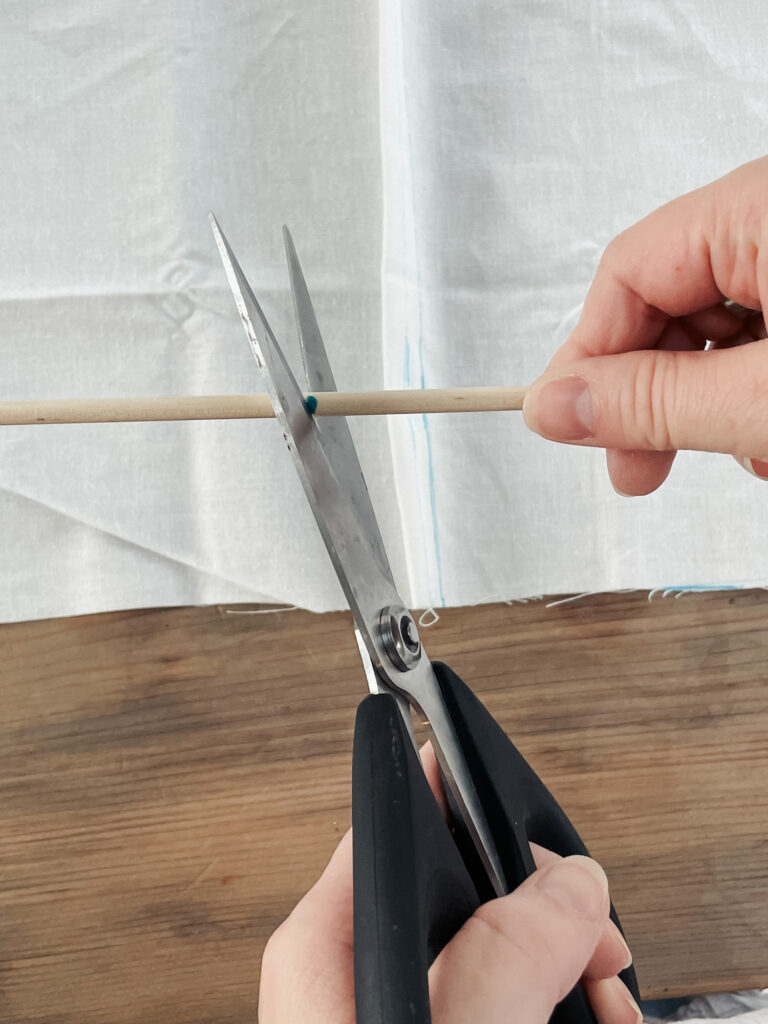
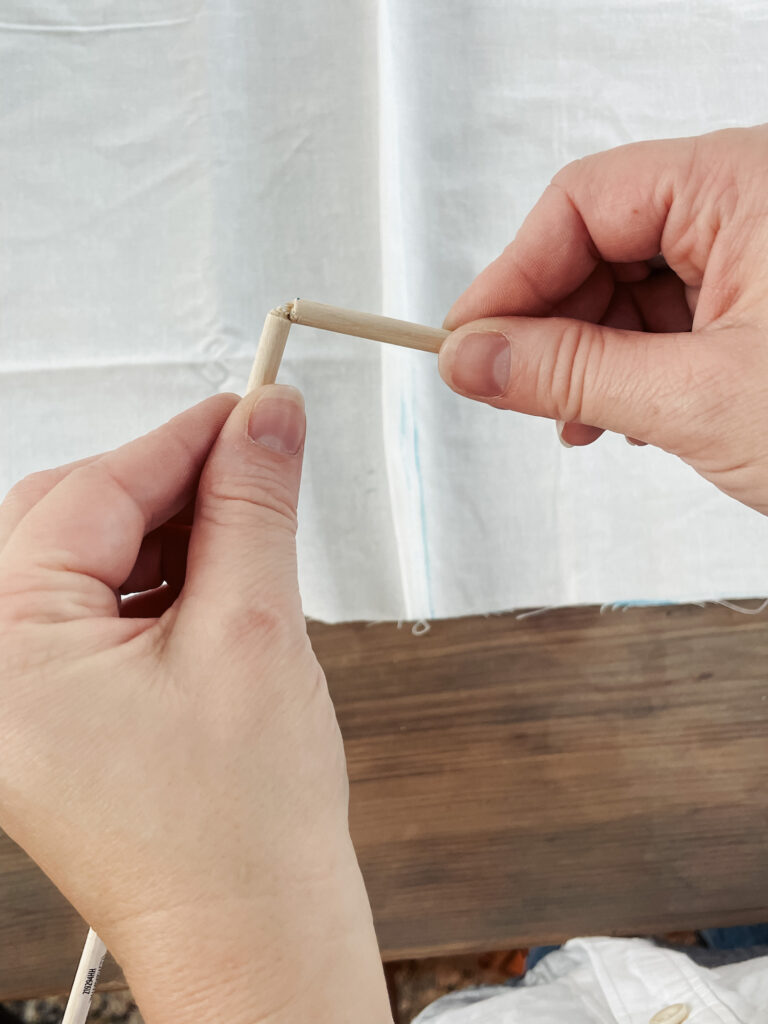
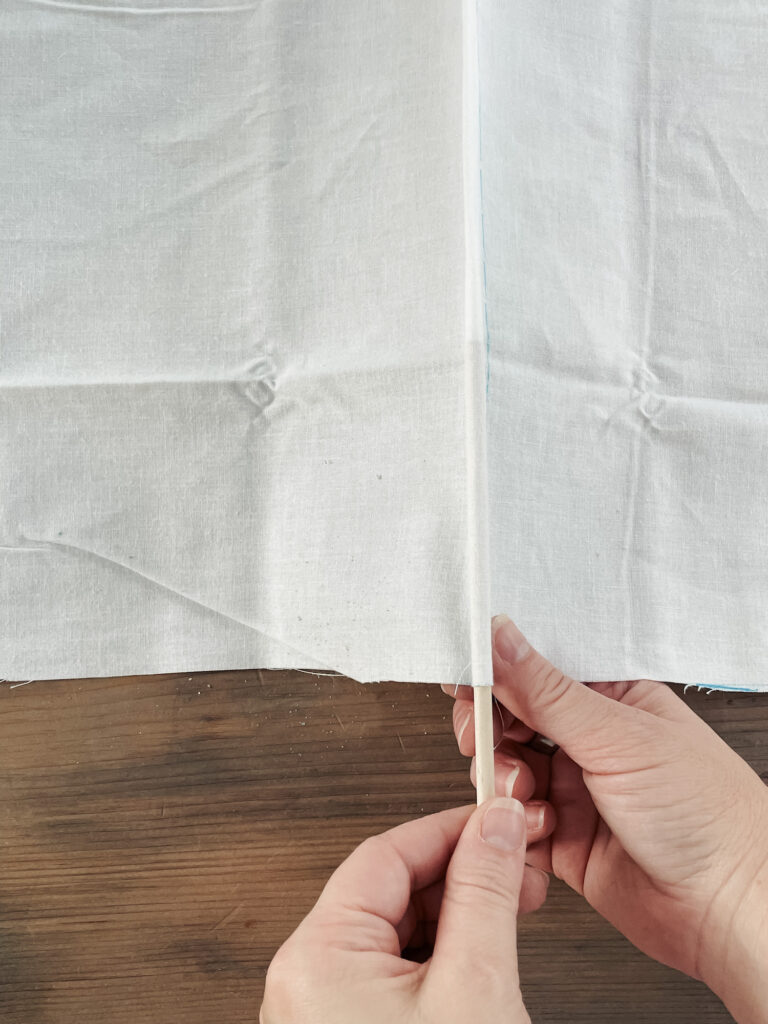
Mark your dowels just slightly shorter than the width of your backing fabric, score and snap them to length, then insert them into the pockets you’ve created for them in the backing fabric. (See image below)
See how nice the inside of the shade looks with the liner fabric and boning?
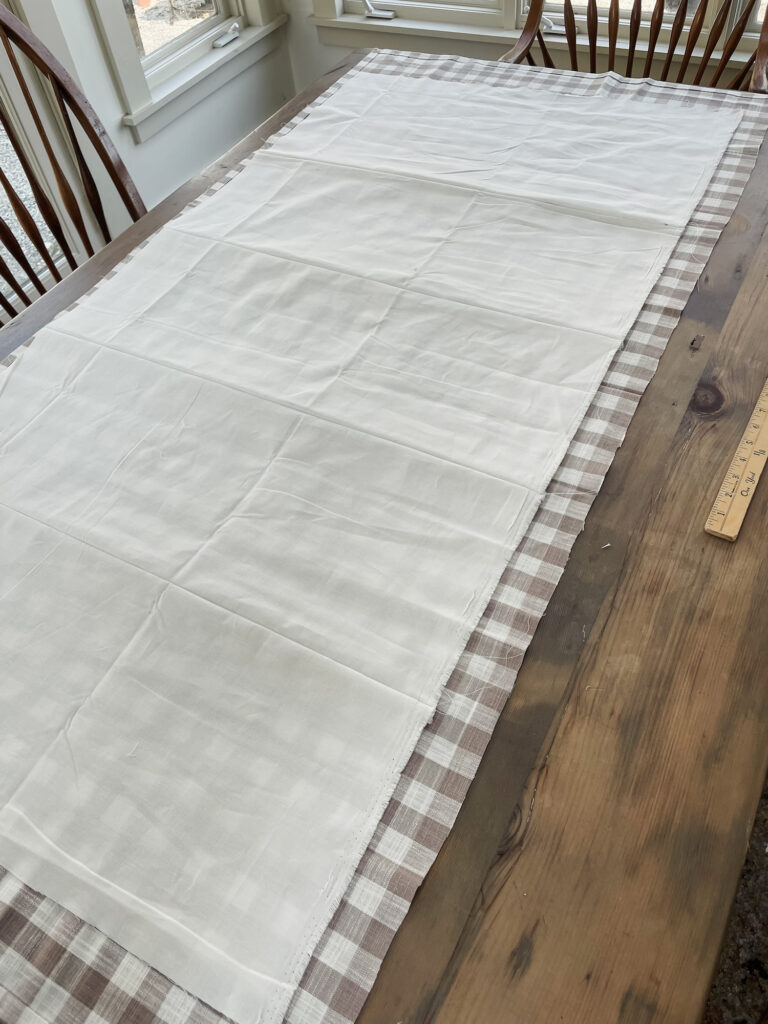
Step 4: Cut out your front fabric.
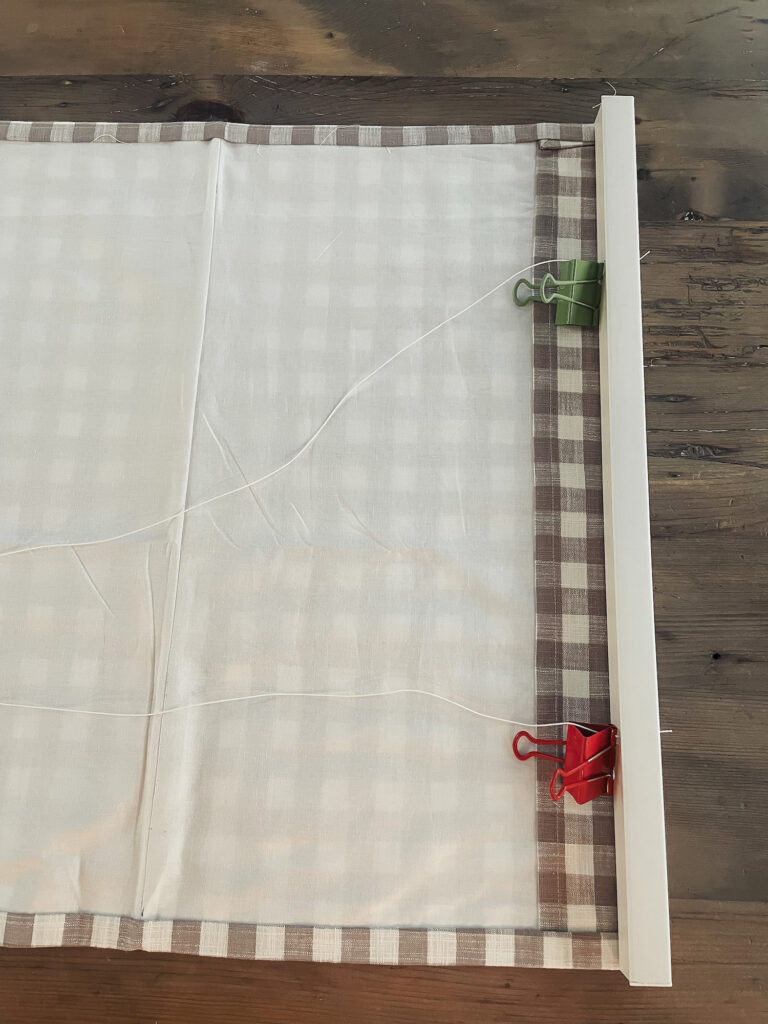
Cut out your front fabric with an extra 2 inches on each side, 4 inches on top, and 3 inches on bottom. Place the backing fabric on top of the front fabric, with the dowel pockets down. (See image above).
Step 5: Hem the shade.
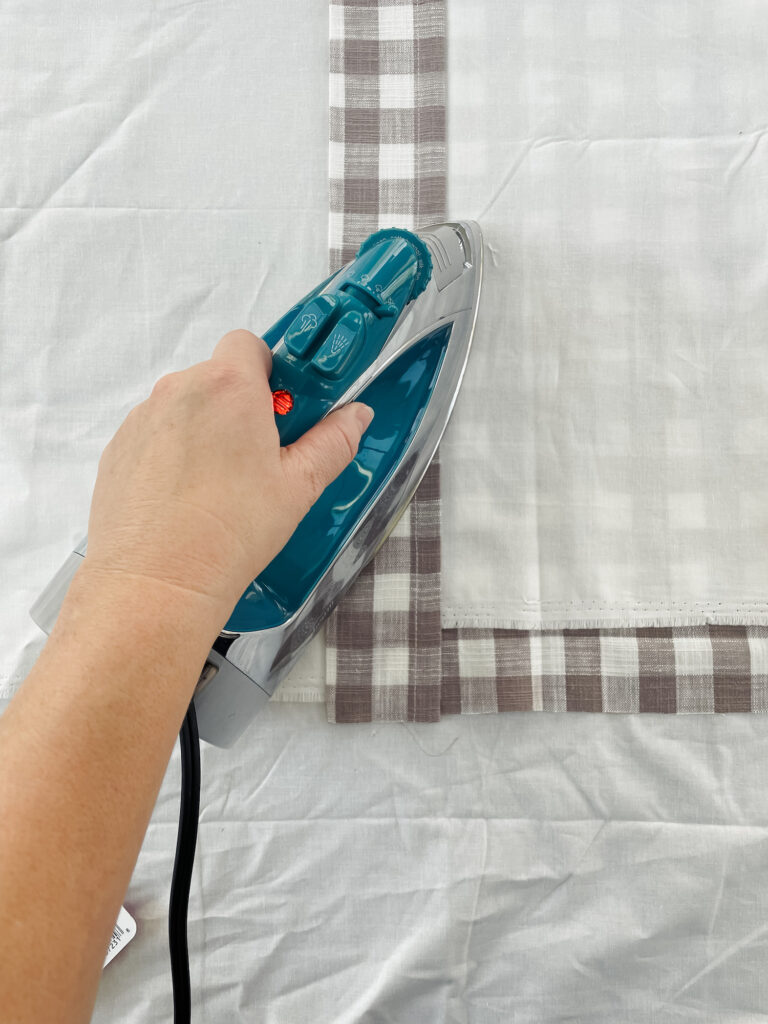
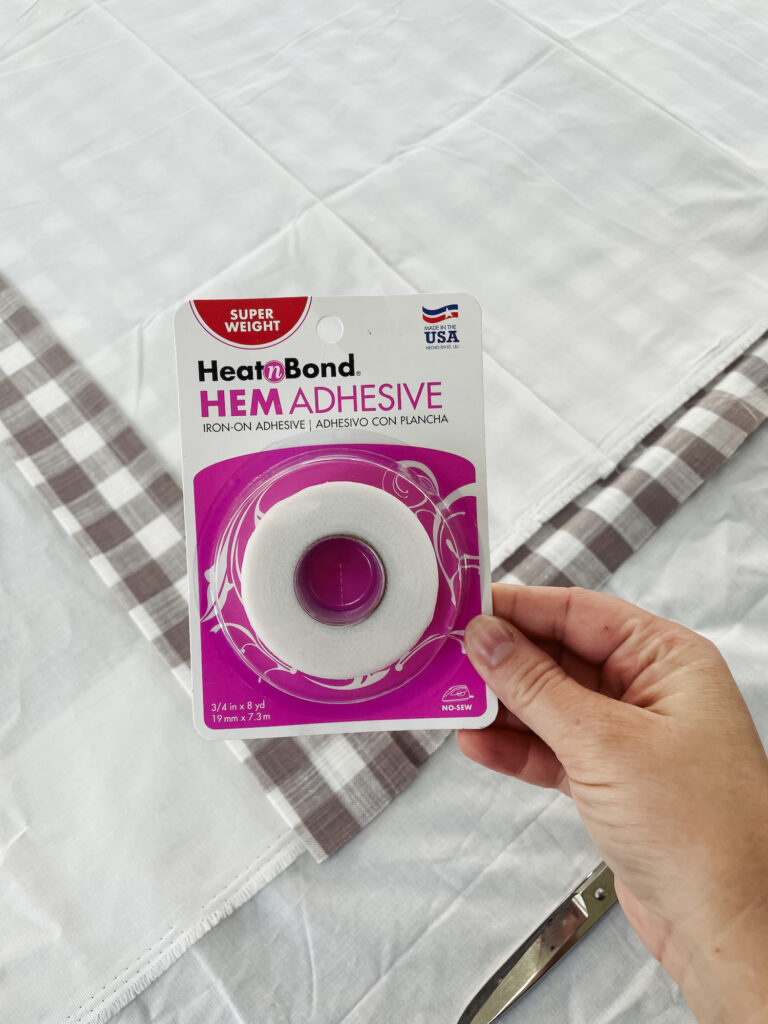
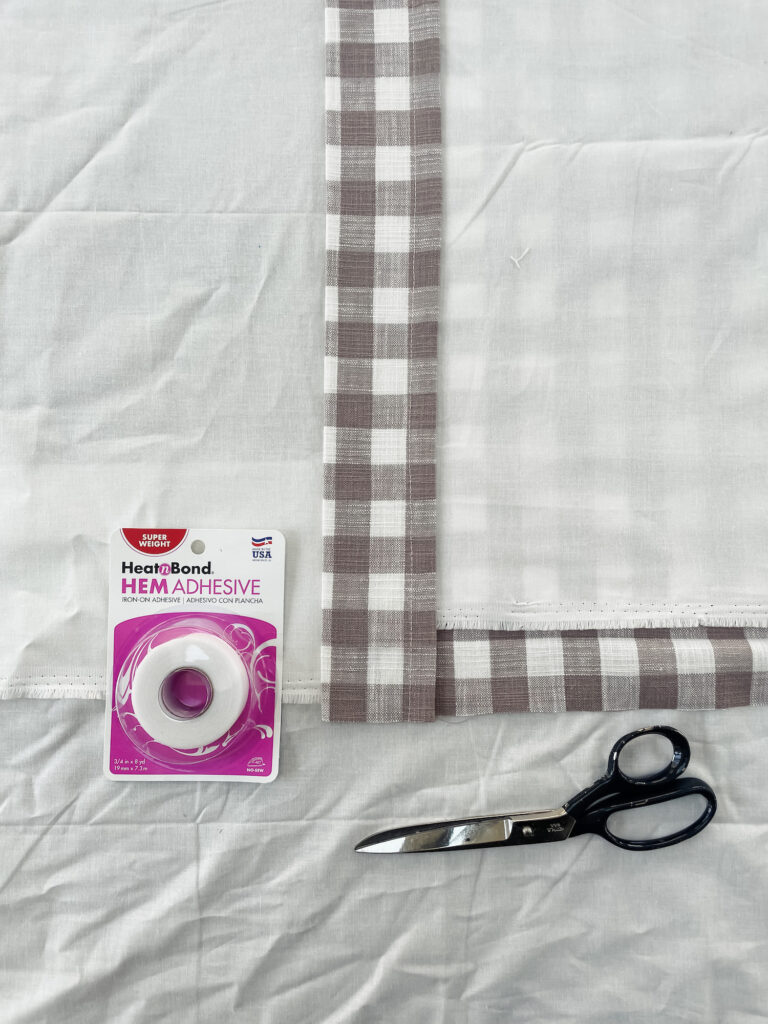
Using the iron on hem tape you are going to hem your fabric. Starting with the top and bottom, then following with the sides. Bring the fabric in and hem so it ends up being the same size as your backing fabric. (This is important, when it’s all hemmed the width of the fabric should match the width of the mini blinds).
To use the hem tape, insert it right on the edge of the hemline, and iron it down using a medium heat iron, with no steam, 8 seconds per section. Allow to cool before checking if the tape adhered.
Step 6: Prep the mini blind
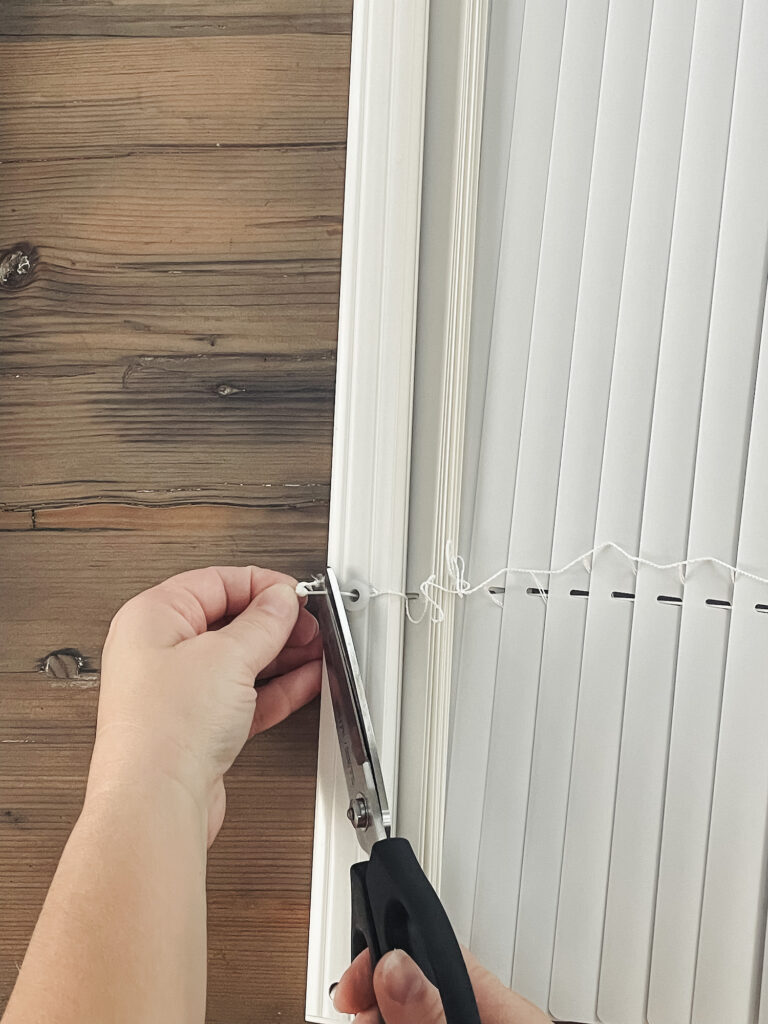
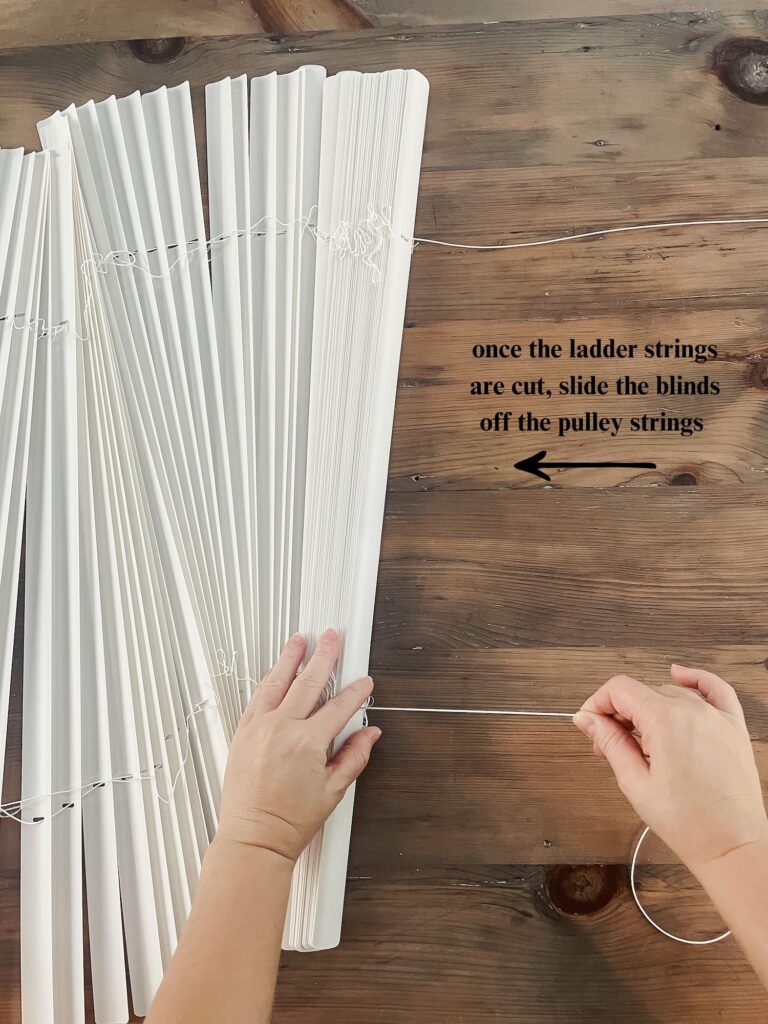
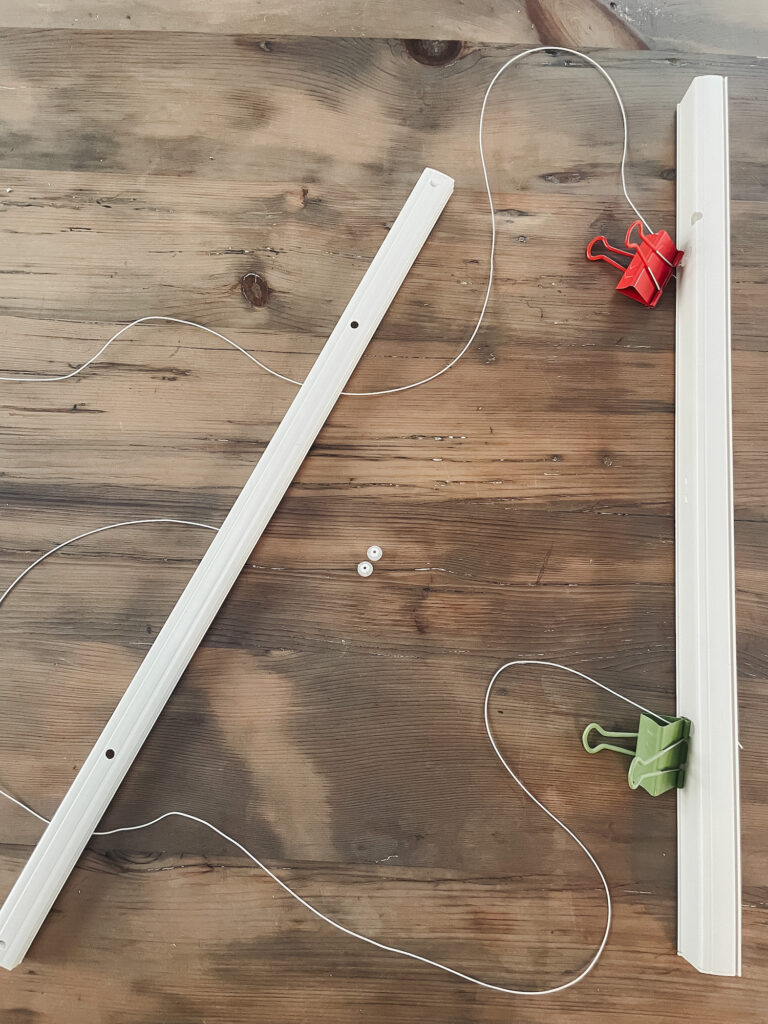
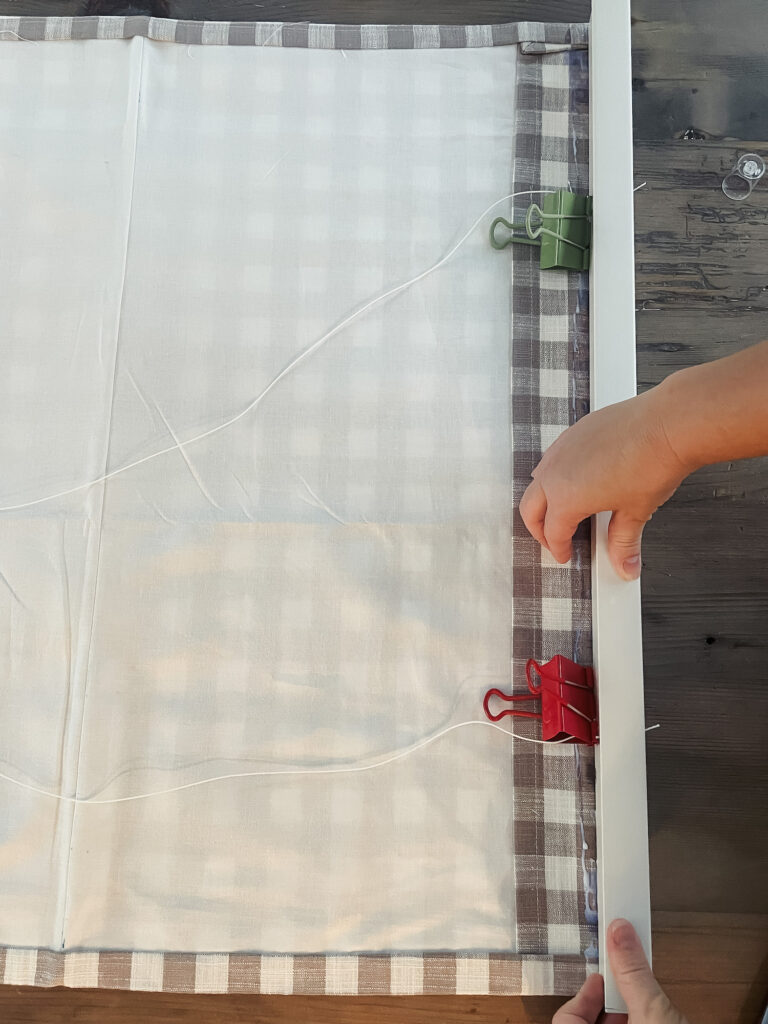
Prep your mini blinds mechanism. Once the fabric is all hemmed, it’s time to prep your mini blinds. For this project we are only using the mechanism, not the actual blinds. To do that you need first cut the ladder strings off at the top of the blind being careful not to cut the main pulley string as you will be using that later. (See image below). Once you’ve got the ladder strings cut, clamp a heavy duty binder clip to the pulley string so it doesn’t retract into the blind while you work. (This is important!!! See image below).
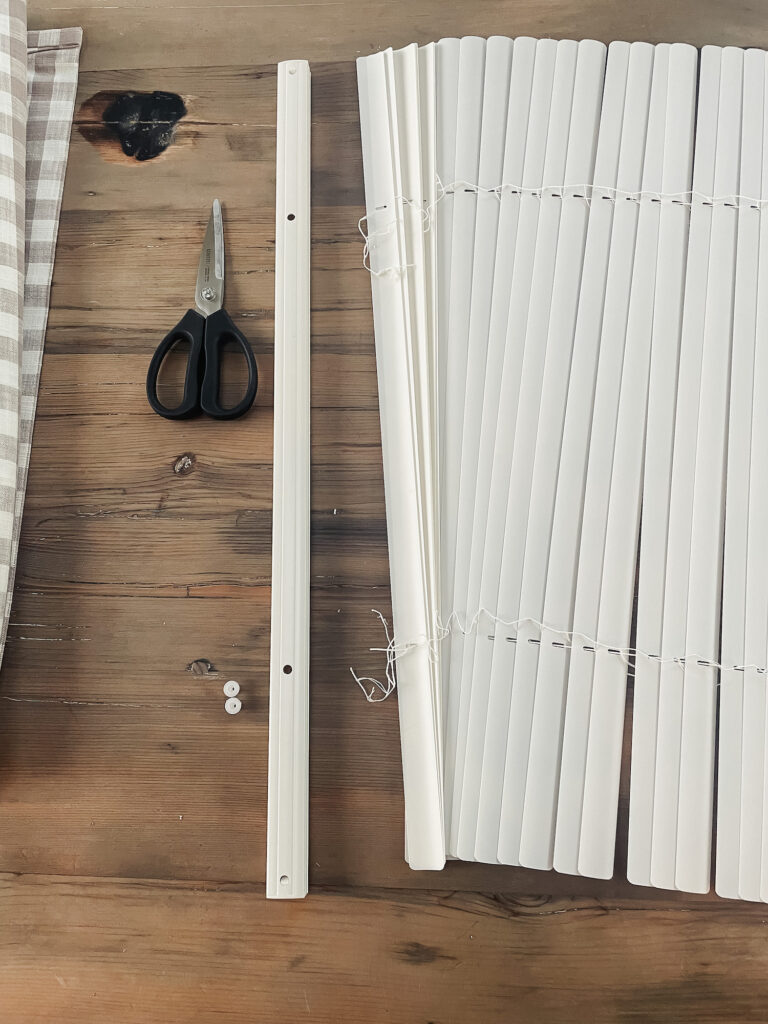
After the binder clips are clamped on, remove the bottom stopper, and slide all the blinds off. When you are done there should just be the top mechanism, 2 pulley strings, the bottom bar, and the stoppers left. (See image below)
Step 7: Attach the blind mechanism to your shade.
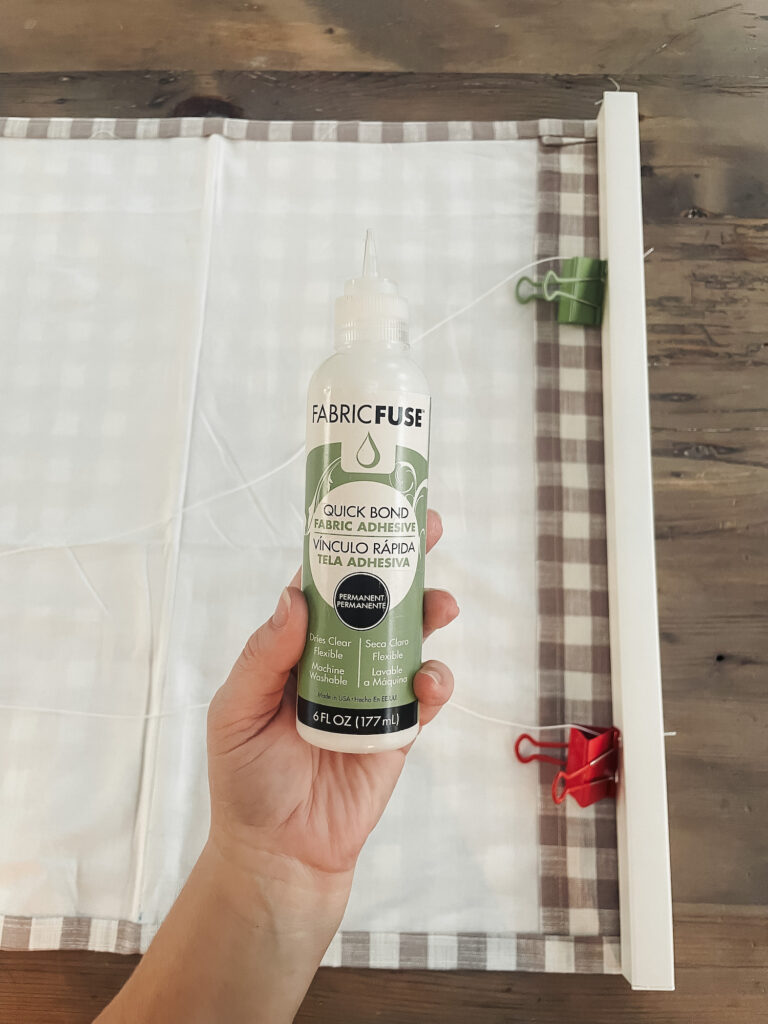
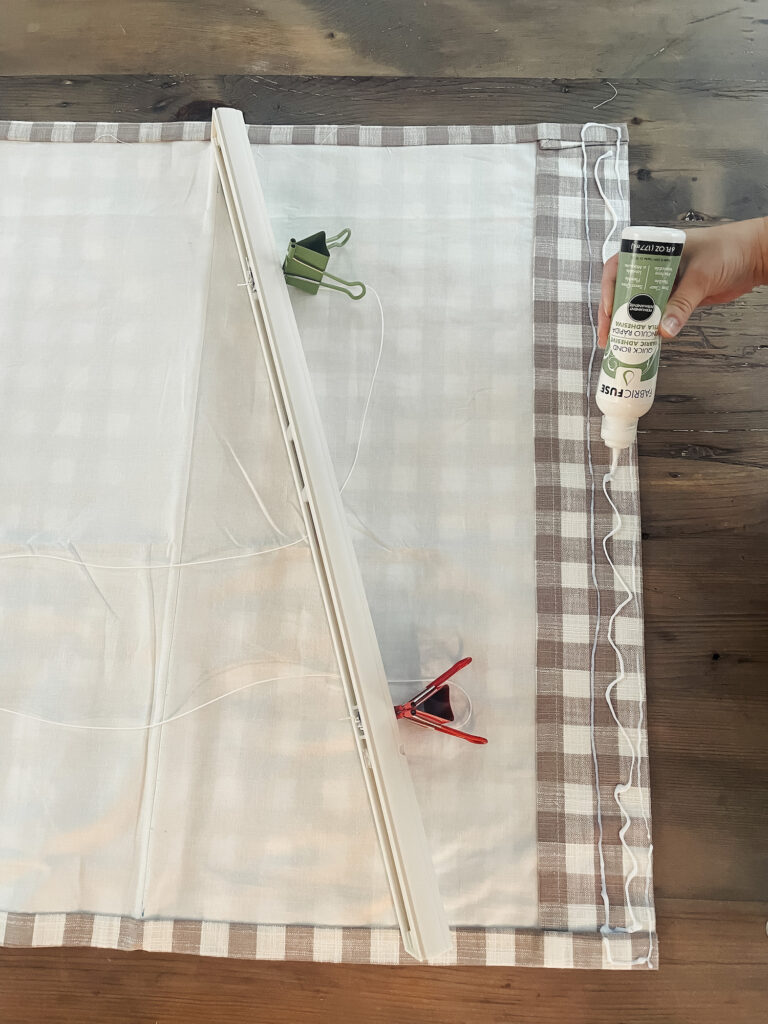
Attach the top mechanism to the top of the shade, using fabric fuse. Apply fabric fuse to the top of the shade fabric and place the mechanism front face down, lining it up with the top edge of the shade material. Don’t go too heavy on the fabric glue, if it bleeds through it will ruin the look of your shade and you’ll have to start over. (I learned this the hard way…)
Step 7: Sew your roman shade rings to the back.
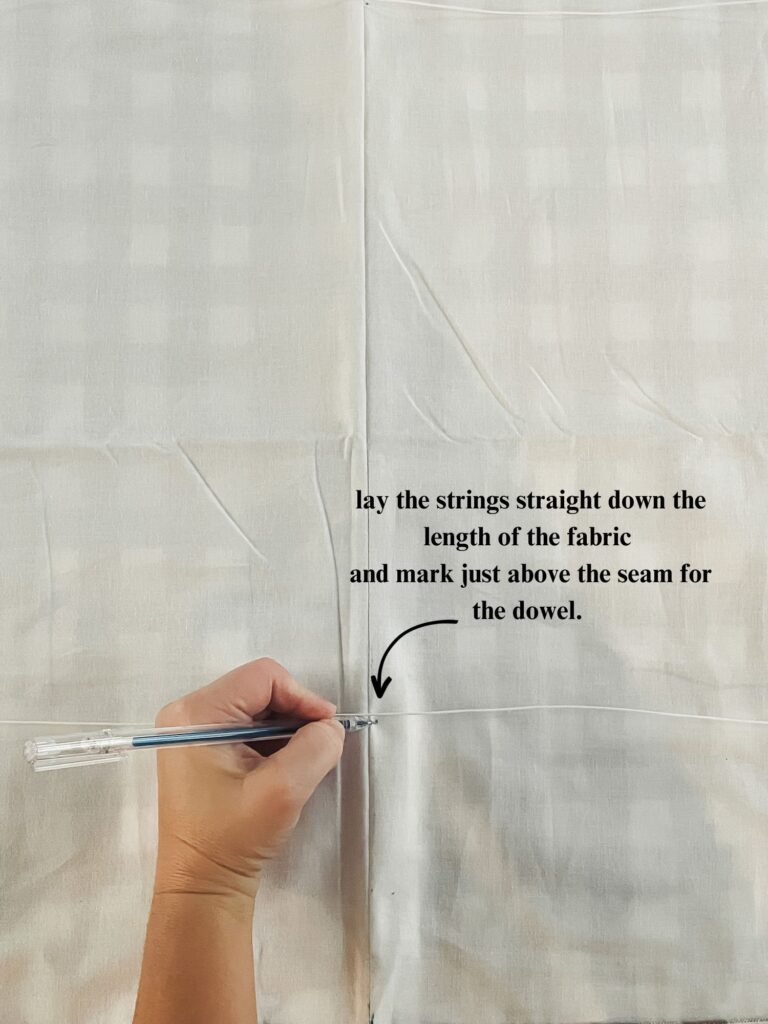
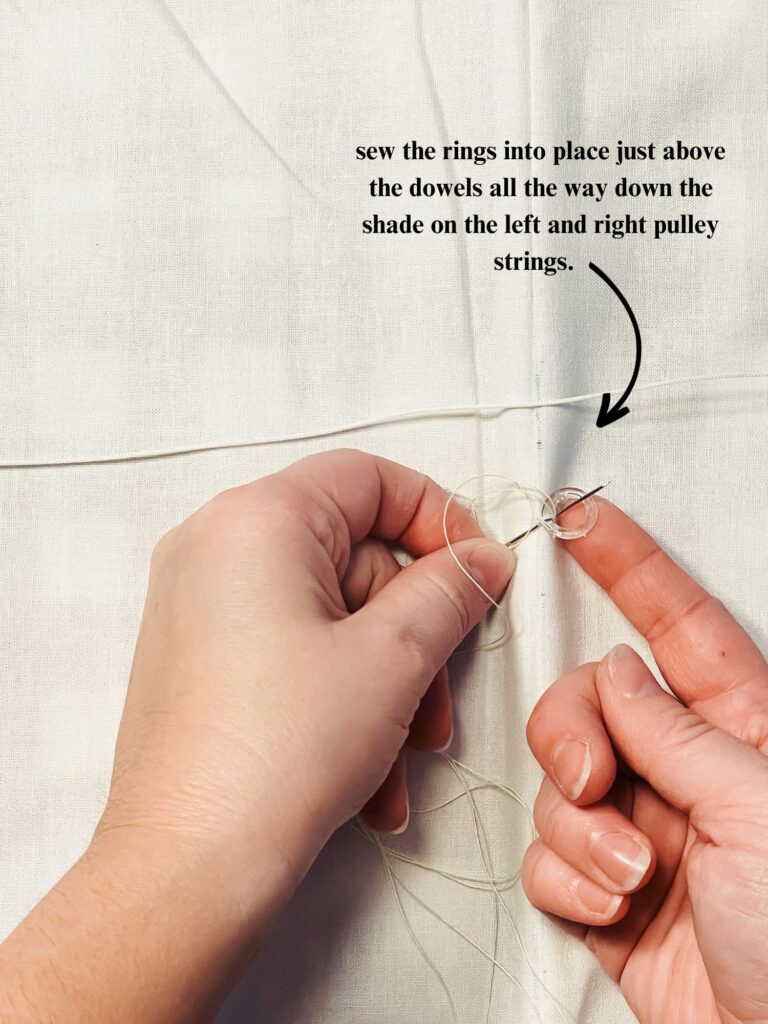
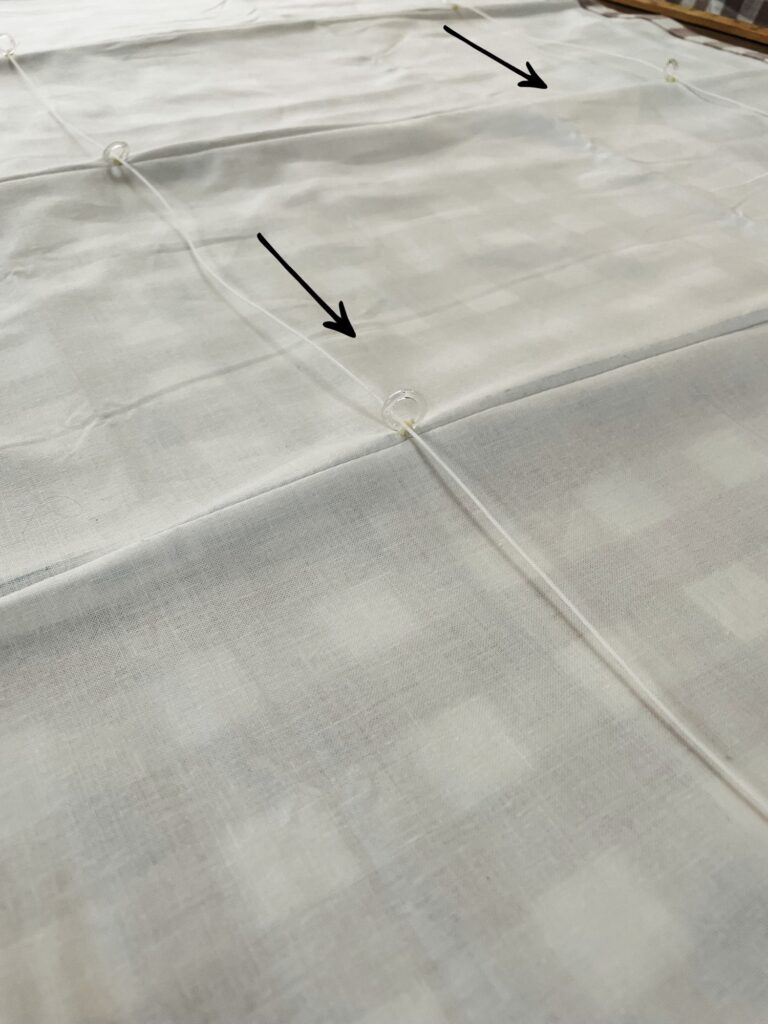
Add your roman shade rings. Lay the strings straight down the length of the shade, and mark just above the seam for the dowel. Then with a needle and thread secure the rings into place just above the dowels all the way down the shade on both sides.
Step 8: Thread the rings and reattach the bottom bar.
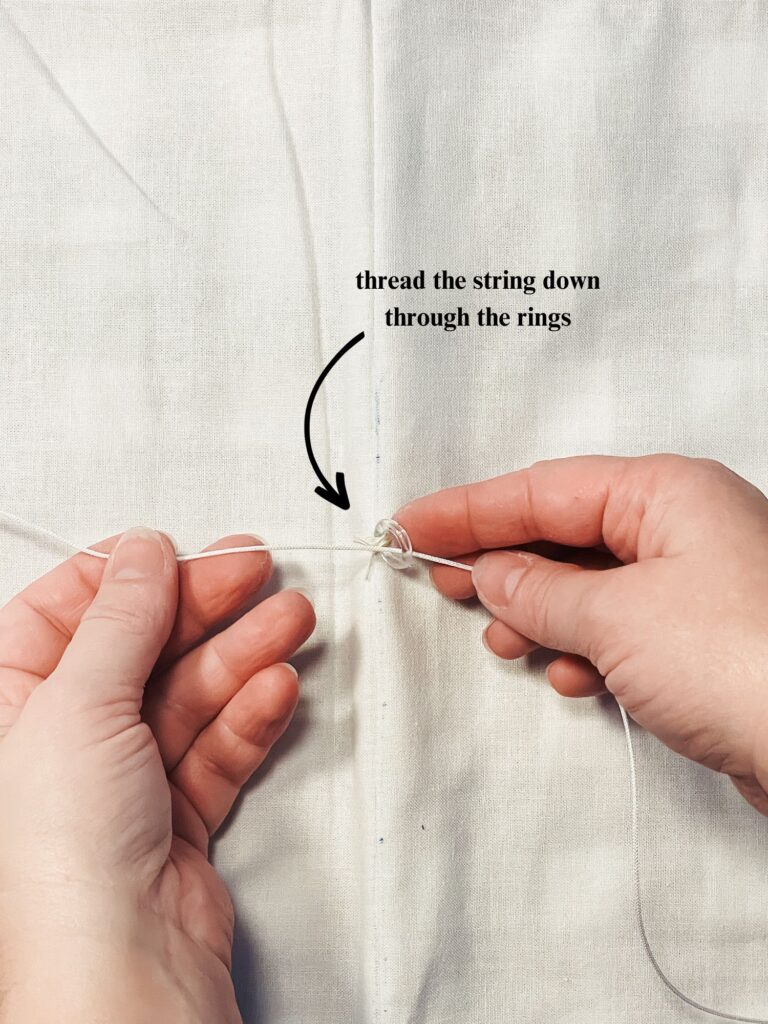
Once the rings are on, thread the strings down through the rings on each side. (See picture.)
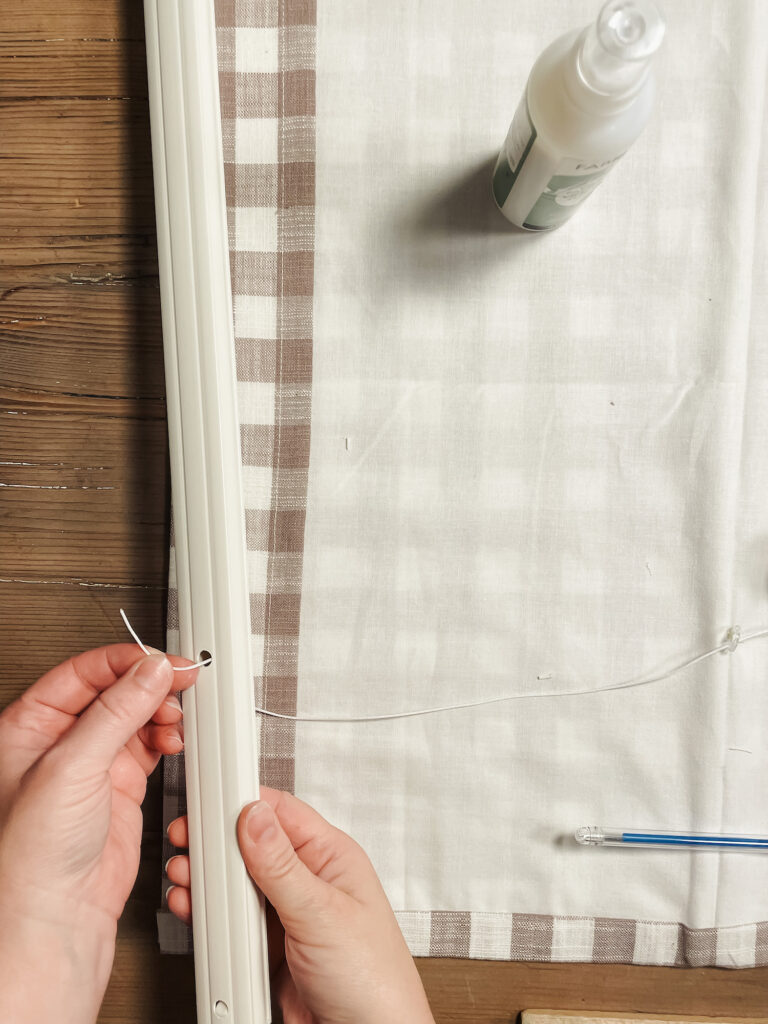
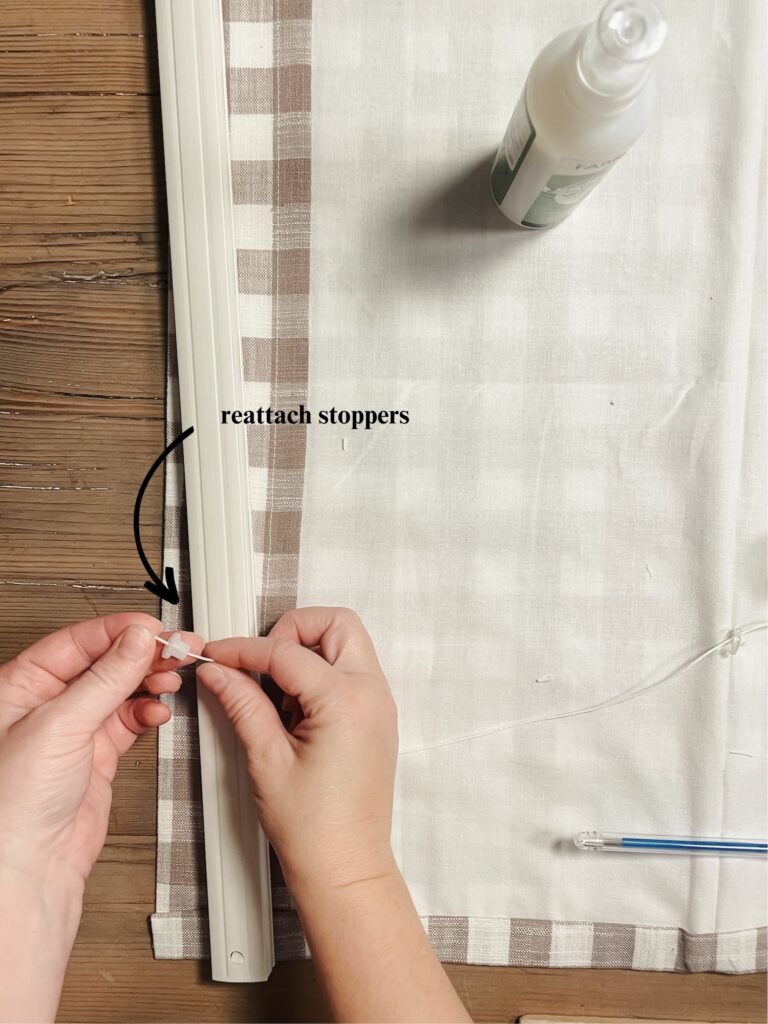
Thread the string through the holes in the bottom bar, and reattach the stoppers.
Once the stoppers are in, glue the bottom bar to the bottom edge of the shade fabric.
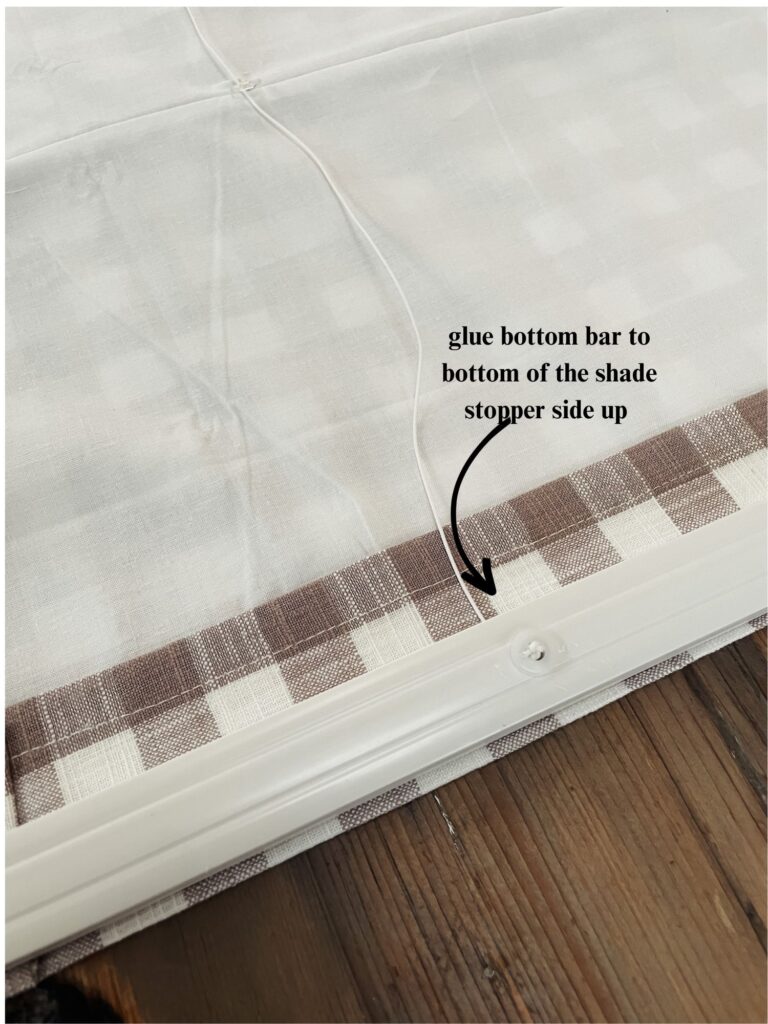
Allow fabric fuse on the Roman shade to dry over night with the binder clips in place.
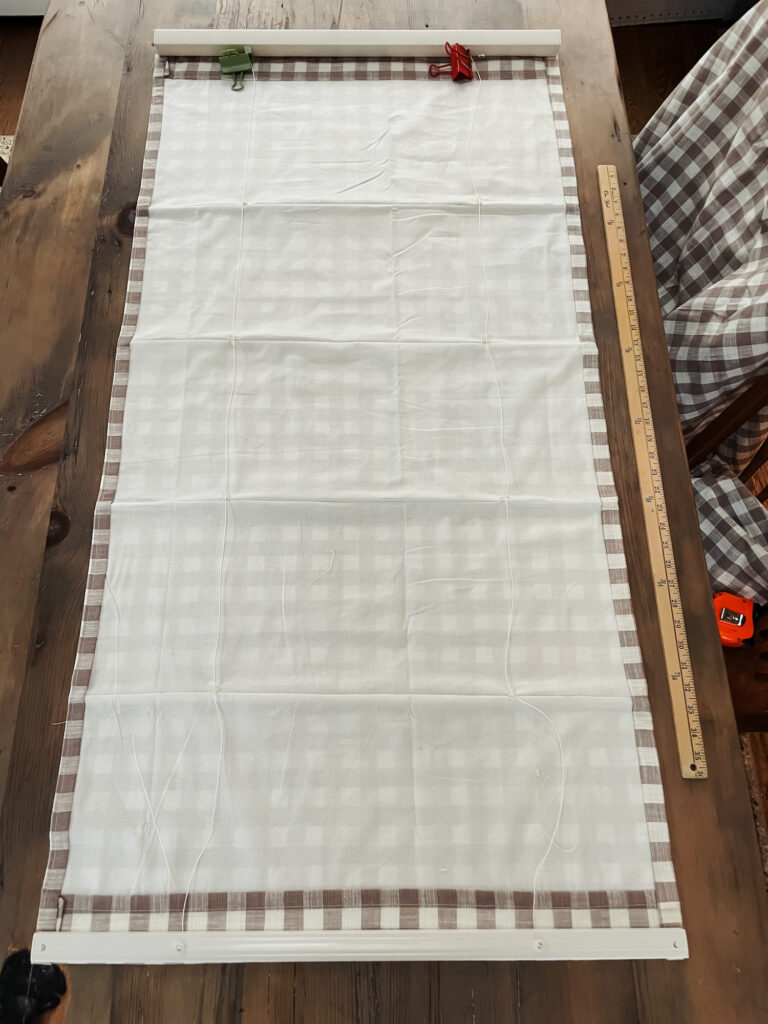
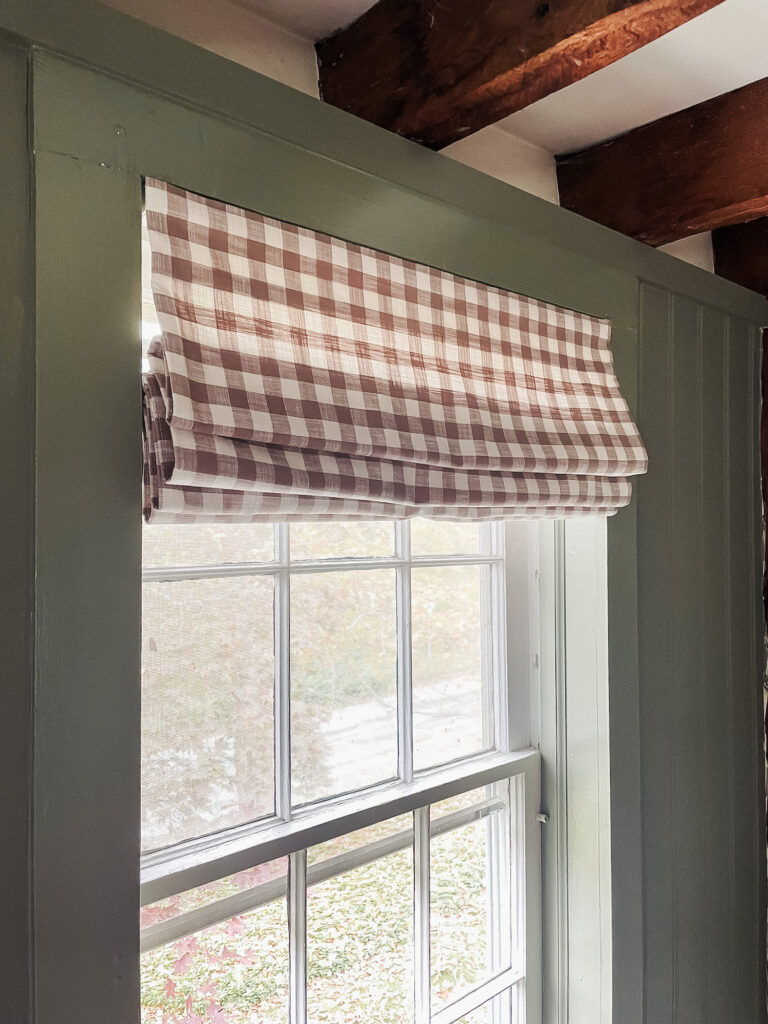
Remove the clamps, retract the blind, training the pleating with the dowels, then install the shade according to manufacturer instructions on the mini blinds.
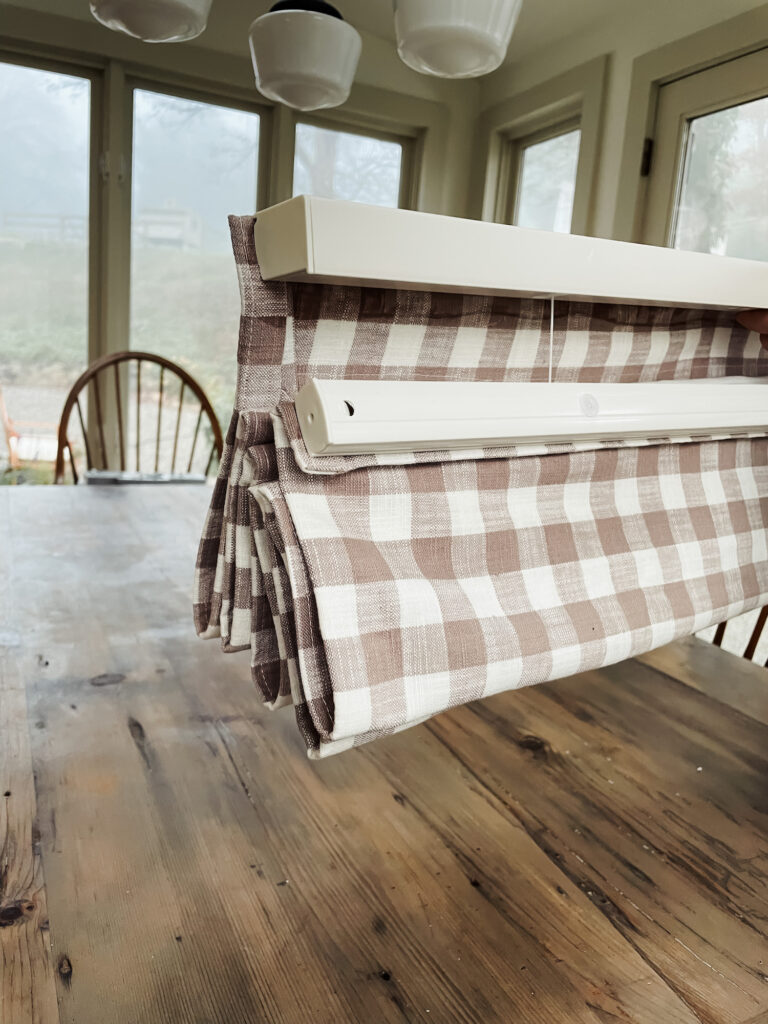
That’s it! This is a fairly easy DIY cordless Roman Shade method and the results are so lovely. I have now used this method 4 times and every time it’s worked perfectly. I hope it works great for you!

Let me know if you plan to try this DIY Roman Shade tutorial, and if you have any questions feel free to ask! Happy Making!
Need some more ideas for making your home beautiful? Try these:
Ten DIY projects you can do in a weekend.
English cottage inspire hutch makeover.
How to make vintage art prints look original.






Do you think it would be possible to shorten the blind? I need 35×52 which is not a standard size.
The height would be super easy to shorten!
Do you have instructions for outside window frame Mount? If so can you send it to me?
Sincere thanks.
BK
the whole tutorial works the same, you would just mount according to instructions on your mini-blinds, and adjust the measurements for outside the window.
Love the idea. Not clear on how many vertical rows of rings are needed?
It depends on the height of your window. If you use the formula you should be able to tell!
Hi Cori, I followed you right up to the end. How do the blinds go up and down? Don’t you still need the pulley cord? I’m your IG reel it looked like you just pushed and pulled the actual blind. I’m looking at my mini blinds already in place that is love to repurpose for this and I can see how it works up to that last point. Thanks in advance Pam x
Hi Pam, this tutorial is specifically for use with cordless mini blinds because they retract on their own, you don’t need a cord. I’m not sure exactly how I would adjust for a corded mini-blind. I’d have to see the mechanism.
Yes, it looks challenging but I am going to give it a try!
I absolutely LOVE this idea and will be using it! BTW, what brand/color is the paint in this room … it is beautiful!!!
I was curious about the function use. How well do they go up and down? Is there a video of them being used? Thanks
Curious, how do you clean the shade? Was wondering if there is a way to make it less permanent especially during cooler months when I want heavier fabric.
How easy is it to clean these? I hate traditional blinds because they are such a pain to dust.
This is such a fun tutorial and it looks phenomenal! I’m looking at doing it in some children’s bedrooms in our ‘new house’ whenever we get there. Question: how has this held up over time? Has the fabric glue baked in the sun or let the fabric fall off of the blind mechanism? Would you do it again or do anything differently? Thanks for offering great DIYs! Joy
Great detailed instructions, first one I lost the string, but learned that lesson!!
I had the same experience!
Question re: DIY Cordless roman shade tutorial. Love it!! Ty
What color is that green in your boys’ room? Ty
It’s actually my girls’ room, and the color is Jojoba by Benjamin Moore!
Just found your Roman blind tutorial and it looks like the best I’ve found and will be trying this weekend. My question is are they still retractable for privacy?
Thank you for the wonderful post.
Cindy D
Yes! They are fully functional!
What do you think about using Velcro to attach top and bottom of mini-blind so it could possibly be washed if needed?
That’s a good idea, you would have to make the rings and boning removable too, but there might be a way!
How have these held up over the years? I think they are brilliant idea, and solve the weird gluing of the plastic mini blind issue that looked not so great. Specifically, has the fabric stayed glued to the upper and lower shade mechanisms? That would be my only concern about longevity.
Hi Marissa, I’ve only had these up for a few months, but so far no issues at all with daily use!
I am working on this project and so excited for how easy and good these look! One question.. when you sew on the rings is it best to have them go through both layers of fabric or just the backing?
Just the backing!
I am going to attempt this! Any chance there is a video? I’m a bit intimidated by the cutting of the strings, is it fairly obviously which one to cut and which one not to?
THANK YOU for this tutorial!
How do you clean these?
All was going perfectly with my diy Roman Shades until my clips flew off after I had attached the shade to the mini blind headrail…Is there any way to fish them out of the headrail?
I’m not sure!